


Invoicing has been a staple of At The Yard for many years. Going back to our earliest days we wanted to ensure the laborious task of invoicing was made as quick and painless as possible. Since then we've introduced a host of refinements and enhancements each making invoicing easier and quicker and just better!
But at the end of the day... the best invoicing is still the invoicing you never have to do!
With this end in mind we're pleased to introduce a new feature to invoicing in At The Yard - Automated and Advanced Service Invoicing. It's going to save you time, streamline your accounting and improve your yards cash flow.
Automated Service Invoicing lets you set individual services to automatically create an invoice and send it to the customer. Advanced Service Invoicing lets you configure the automated invoices to be sent out in advance of the service date.
Recurring services, such as livery packages and fixed monthly charges represent a large proportion of a yards income. As such it's essential that the invoices for these services go out on time and that payment is received promptly to ensure a steady cash flow for the yard.
By combining automation this with advanced billing you can improve cash flow further by making sure payment is received in advance of the provision of service. This also allows you to address any issues with non payment before the service is delivered.
Life is unpredictable (especially when you run a livery yard) but by automating livery billing it ensures that no matter what else is going on, your business can keep it's cash flowing and the business running.
You may be asking how is this different to the 'Automatically Generate Invoices' option that's already available. From an automation point of view - nothing.
Both features will automatically send out invoices. However the key difference is this new feature gives you all the convenience of automatic invoicing for charges that rarely change (e.g. livery) whilst allowing you to review the invoices for extra charges prior to sending them out (something lots of yard owners like to do).
Setting up this powerful feature is quick and straightforward. Follow these simple steps to get started:
Step 1: Log in to Your attheyard.co.uk Account Visit our website and log in to your account using your credentials.
Step 2: Navigate to the Services Section Once logged in, navigate to the services page under the Admin tab. Click 'Edit' on the service you wish to setup for automatic invoicing.
Step 3: Set 'Auto invoice subscription' to 'Yes'
In the service class settings box locate the drop down called 'Auto invoice subscription' and set it to 'Yes'

Step 4: Submit Your Update Click on 'Update Service' at the bottom of the form.
Step 1: Log in to Your attheyard.co.uk Account Visit our website and log in to your account using your credentials.
Step 2: Navigate to the 'Configure Yard' Page Once logged in, navigate to the 'Configure Yard' page under the Admin tab.
Step 3: Find the 'Invoice Settings' section
In this section click on 'Edit Invoice Settings' to bring up the invoice settings page.

Step 4: Set 'Auto Invoicing Services'
Find the 'Auto Invoicing Services' section. From here you can set how far ahead invoices will be automatically sent out.

Step 5: Submit Your Update Click on 'Update' at the bottom of the form.
With our new Automated and Advanced Invoicing feature, attheyard.co.uk is committed to simplifying your invoicing process, saving you time and ensuring a steady and predictable cash flow. Embrace the future of hassle-free invoicing and take your business efficiency to new heights.
Ready to experience the convenience?
In March we released the shop feature for At The Yard after more than a year of testing. It’s allowed our customers to reach a wider audience and create more opportunities for their customers to use and benefit from the facilities and services they offer.
But we didn’t want to stop there, we had more ideas to add new features and improvements which we’re highlighting over the next few posts.
This is one post of multi a part series:
Today we’re highlighting the second update, Image Galleries. Our customers have some of the best facilities around and rightly so they want to show them off! We’re delighted to help them do so by allowing them to post as many pictures of their facilities as they want.
Let’s start by taking a look at how your customers will see these galleries.

A service overview page showing the 3 images of the facility, a description and the available bookings.
Clicking on any of the images allows people to take a look at the image in a bigger form. This is great for showing an a aerial overview of a course as shown in one of the images below.

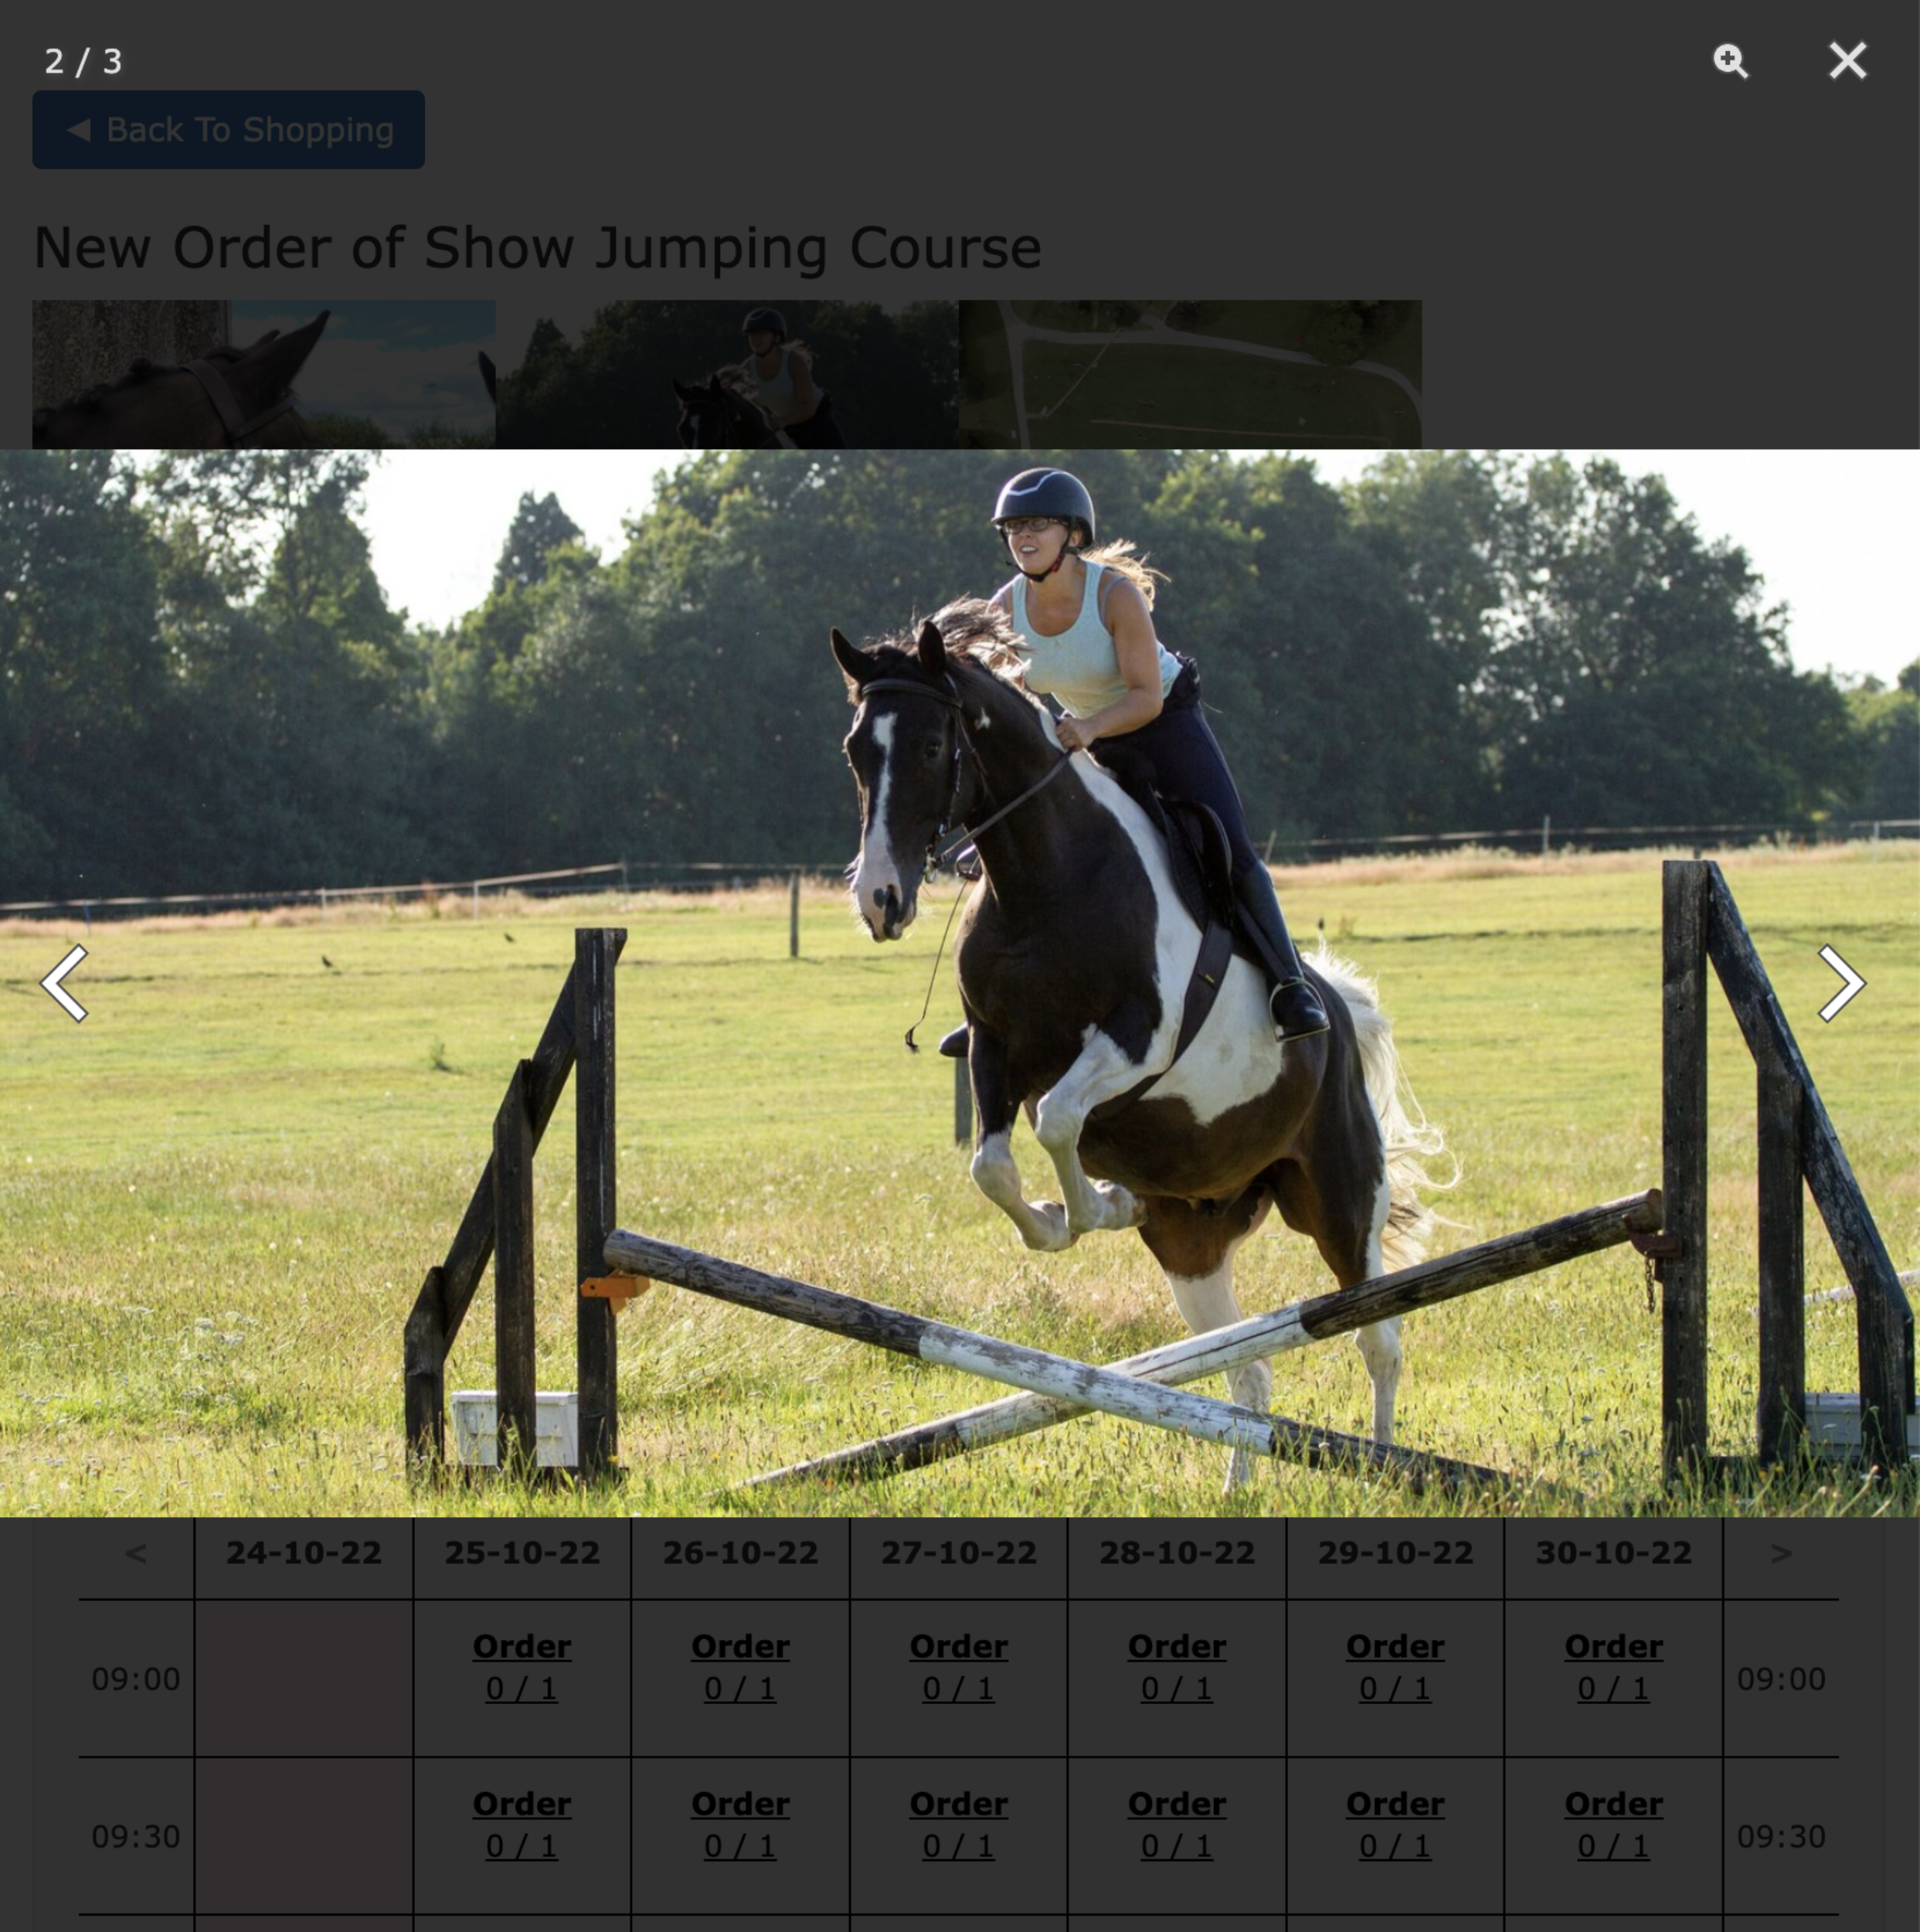
Setup is quick and easy. Go to the Manage Shop page via the admin menu and click on Edit Publication. Scroll down to the Extra Information section and you’ll now see a new option for Gallery Images (shown below).
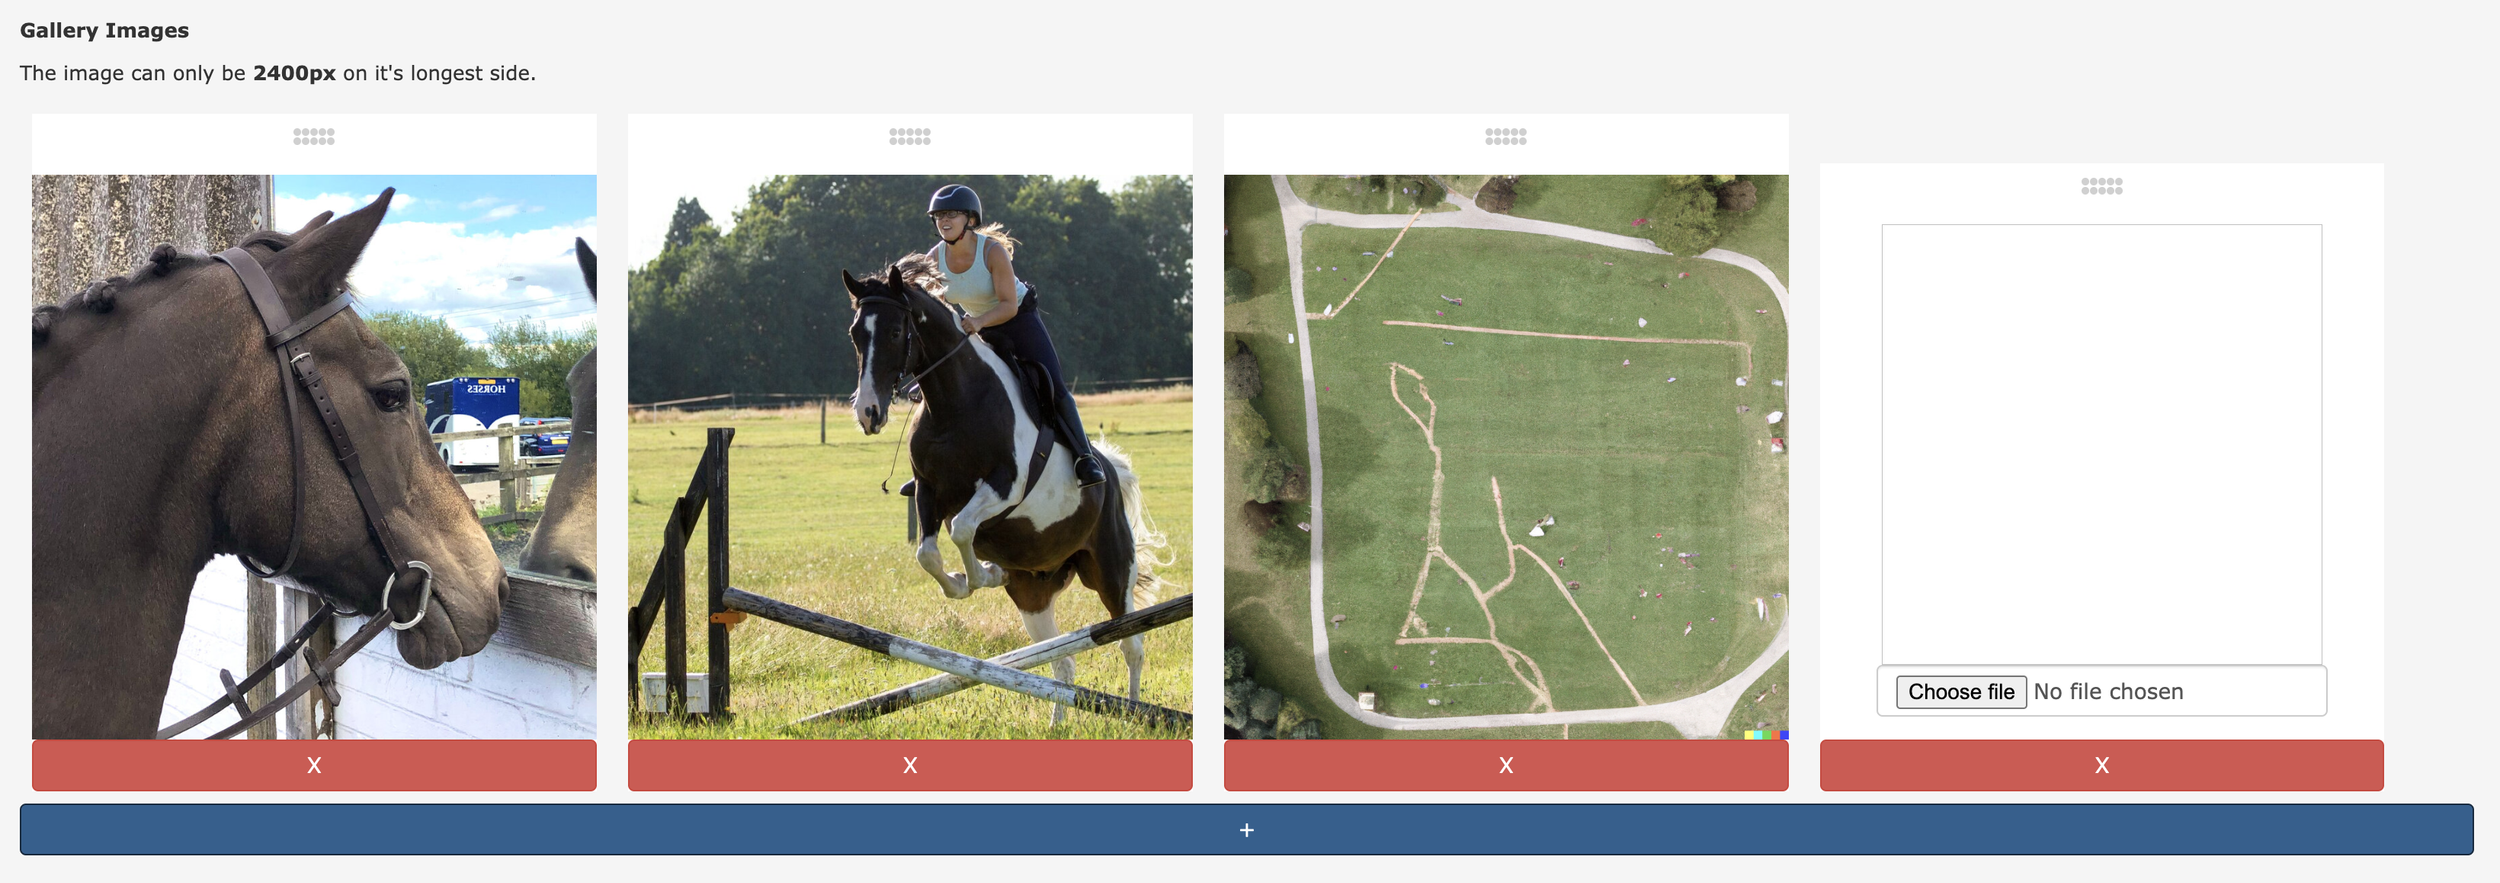
From here you can see your existing images (if you’ve already set some up) and have the option to add more by clicking on the blue + button at the bottom. When you click on the button a new blank option (shown on the far right) will be created allowing you to upload a new image.
You can then use the drag handles located at the top of the images to move everything around into the order you want.
When you’re ready, simply click submit and everything will be updated and ready to go!
Images are a fundamental way we make choices when shopping and with this update we’re excited to have expanded the pre-sales experience you can offer your customers. As we mentioned at the top of the post this is part of a multi-part series highlighting updates that we’ve brought to the shop since it’s launch, so check back soon for the next update.

In March we released the shop feature for At The Yard after more than a year of testing. It’s allowed our customers to reach a wider audience and create more opportunities for their customers to use and benefit from the facilities and services they offer.
But we didn’t want to stop there, we had more ideas to add new features and improvements which we are excited to be highlighting over the next few weeks.
This is one post of multi a part series:
The first of these is Pricing Options. Pricing Options streamlines and improves support for Multi Horse Bookings.
In the initial release of the shop you had to create and publish multiple services to be able to offer multi horse discounts when booking in a single slot (e.g. a service with 1 horse = £20, a service with 2 horses = £35). Not only was this time consuming to create and maintain for the yard but it could make for a cluttered looking shop (shown below).
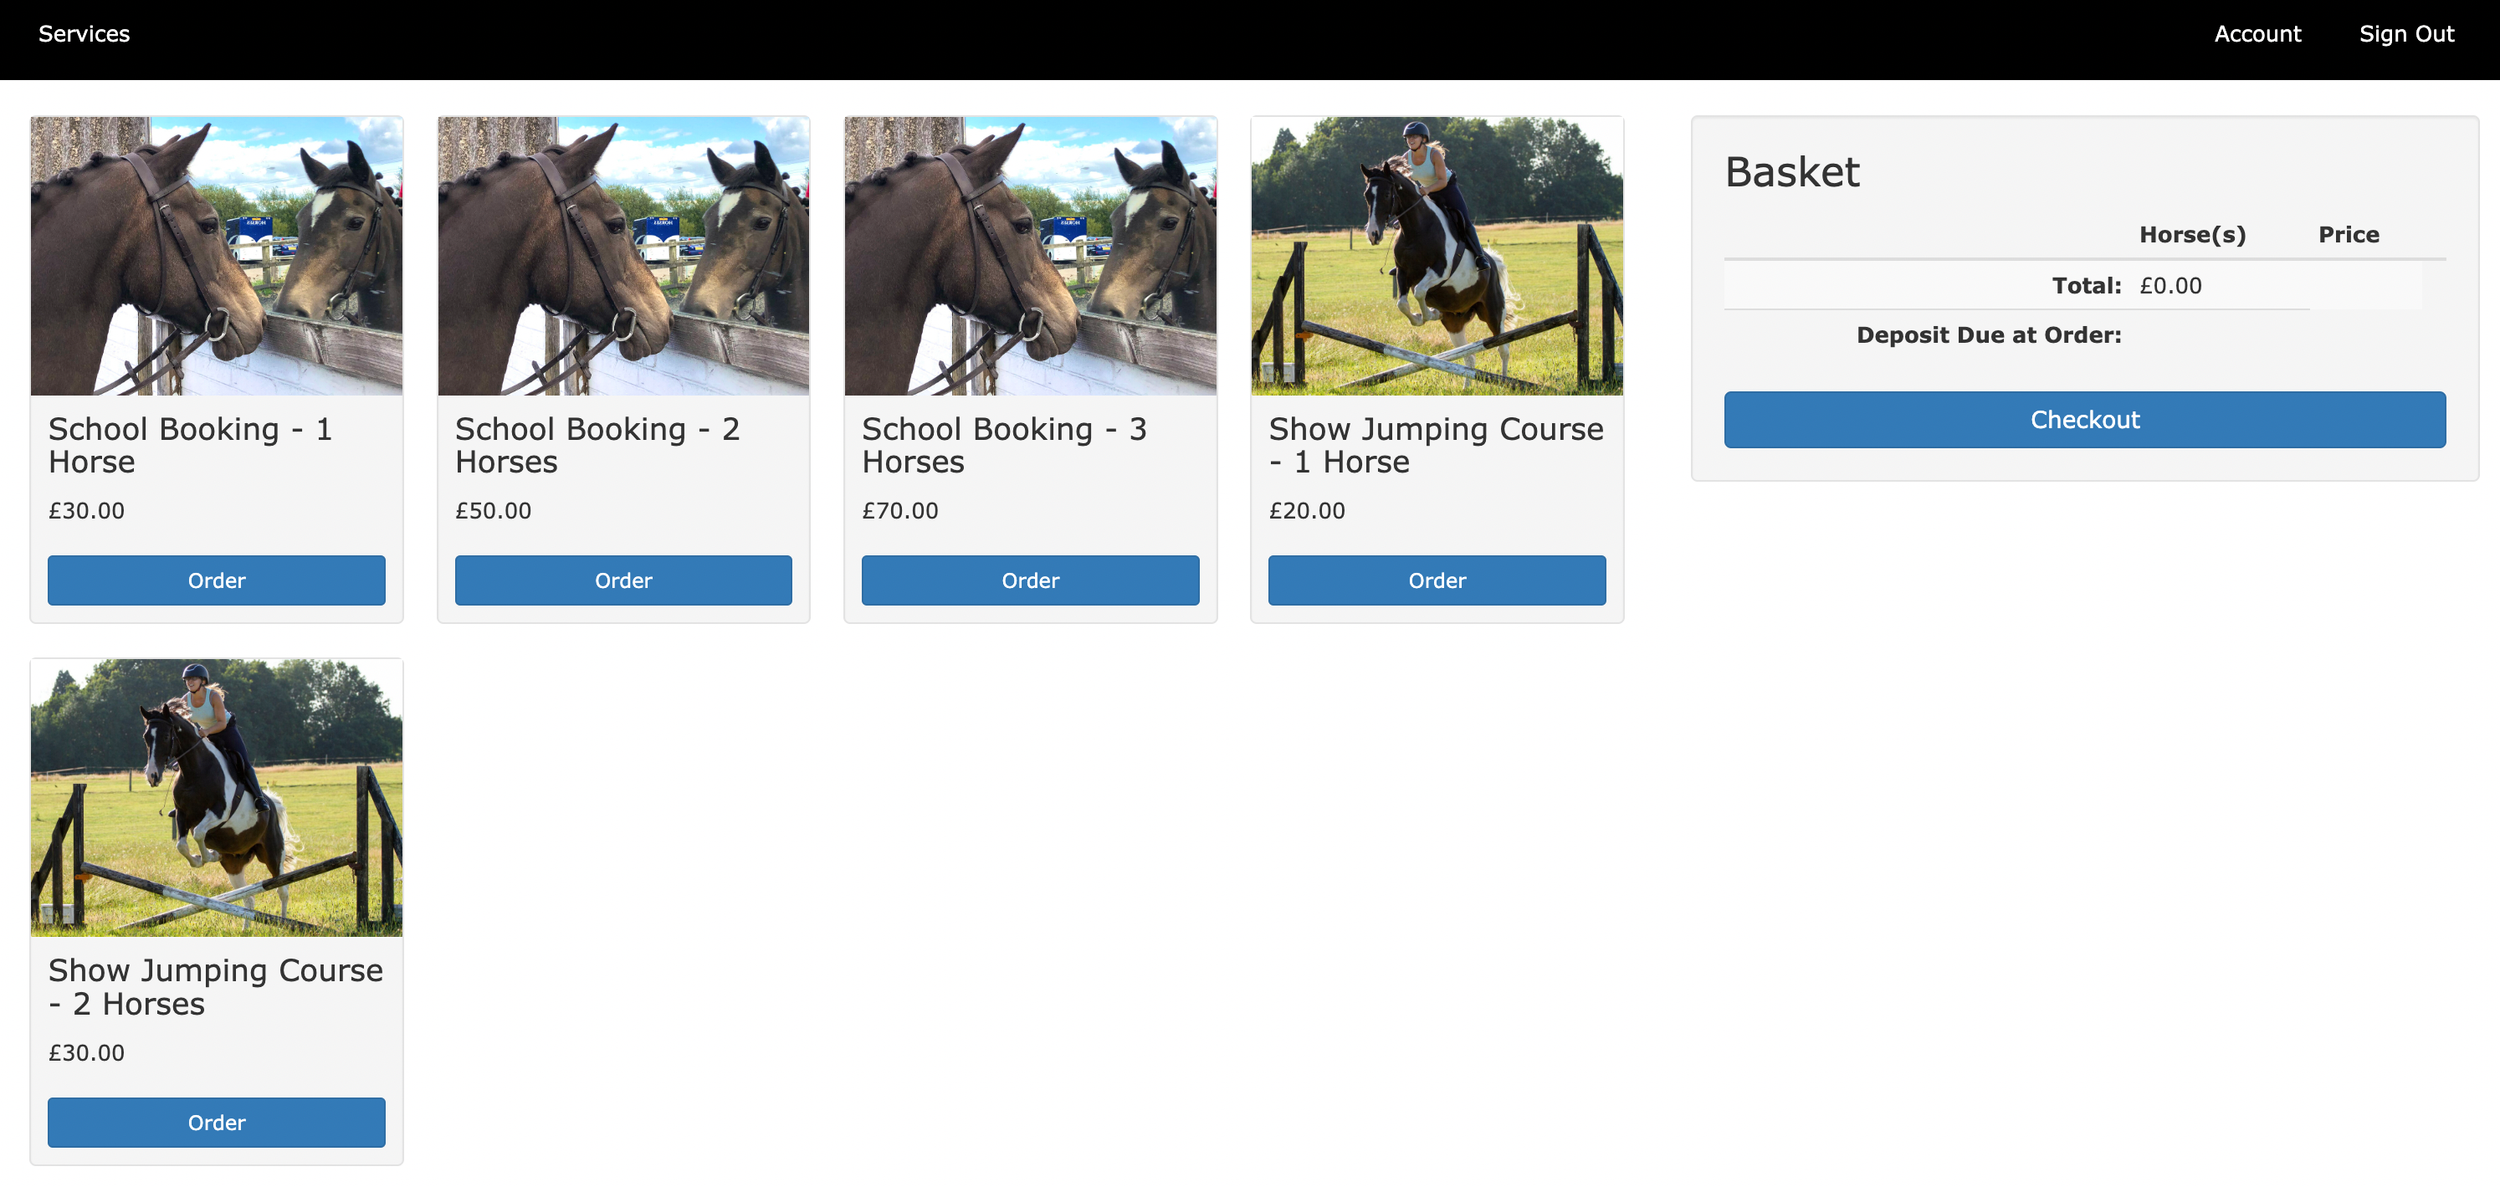
This new feature, Pricing Options changes this by allowing you to publish a single service that has the multiple pricing options setup within. Once setup it results in a much cleaner looking shop (shown below) and makes for an easier booking experience for your customers.
Renting The Arena
Pricing Options
1 Horse - £30.00
2 Horses - £50.00
3 Horses - £70.00
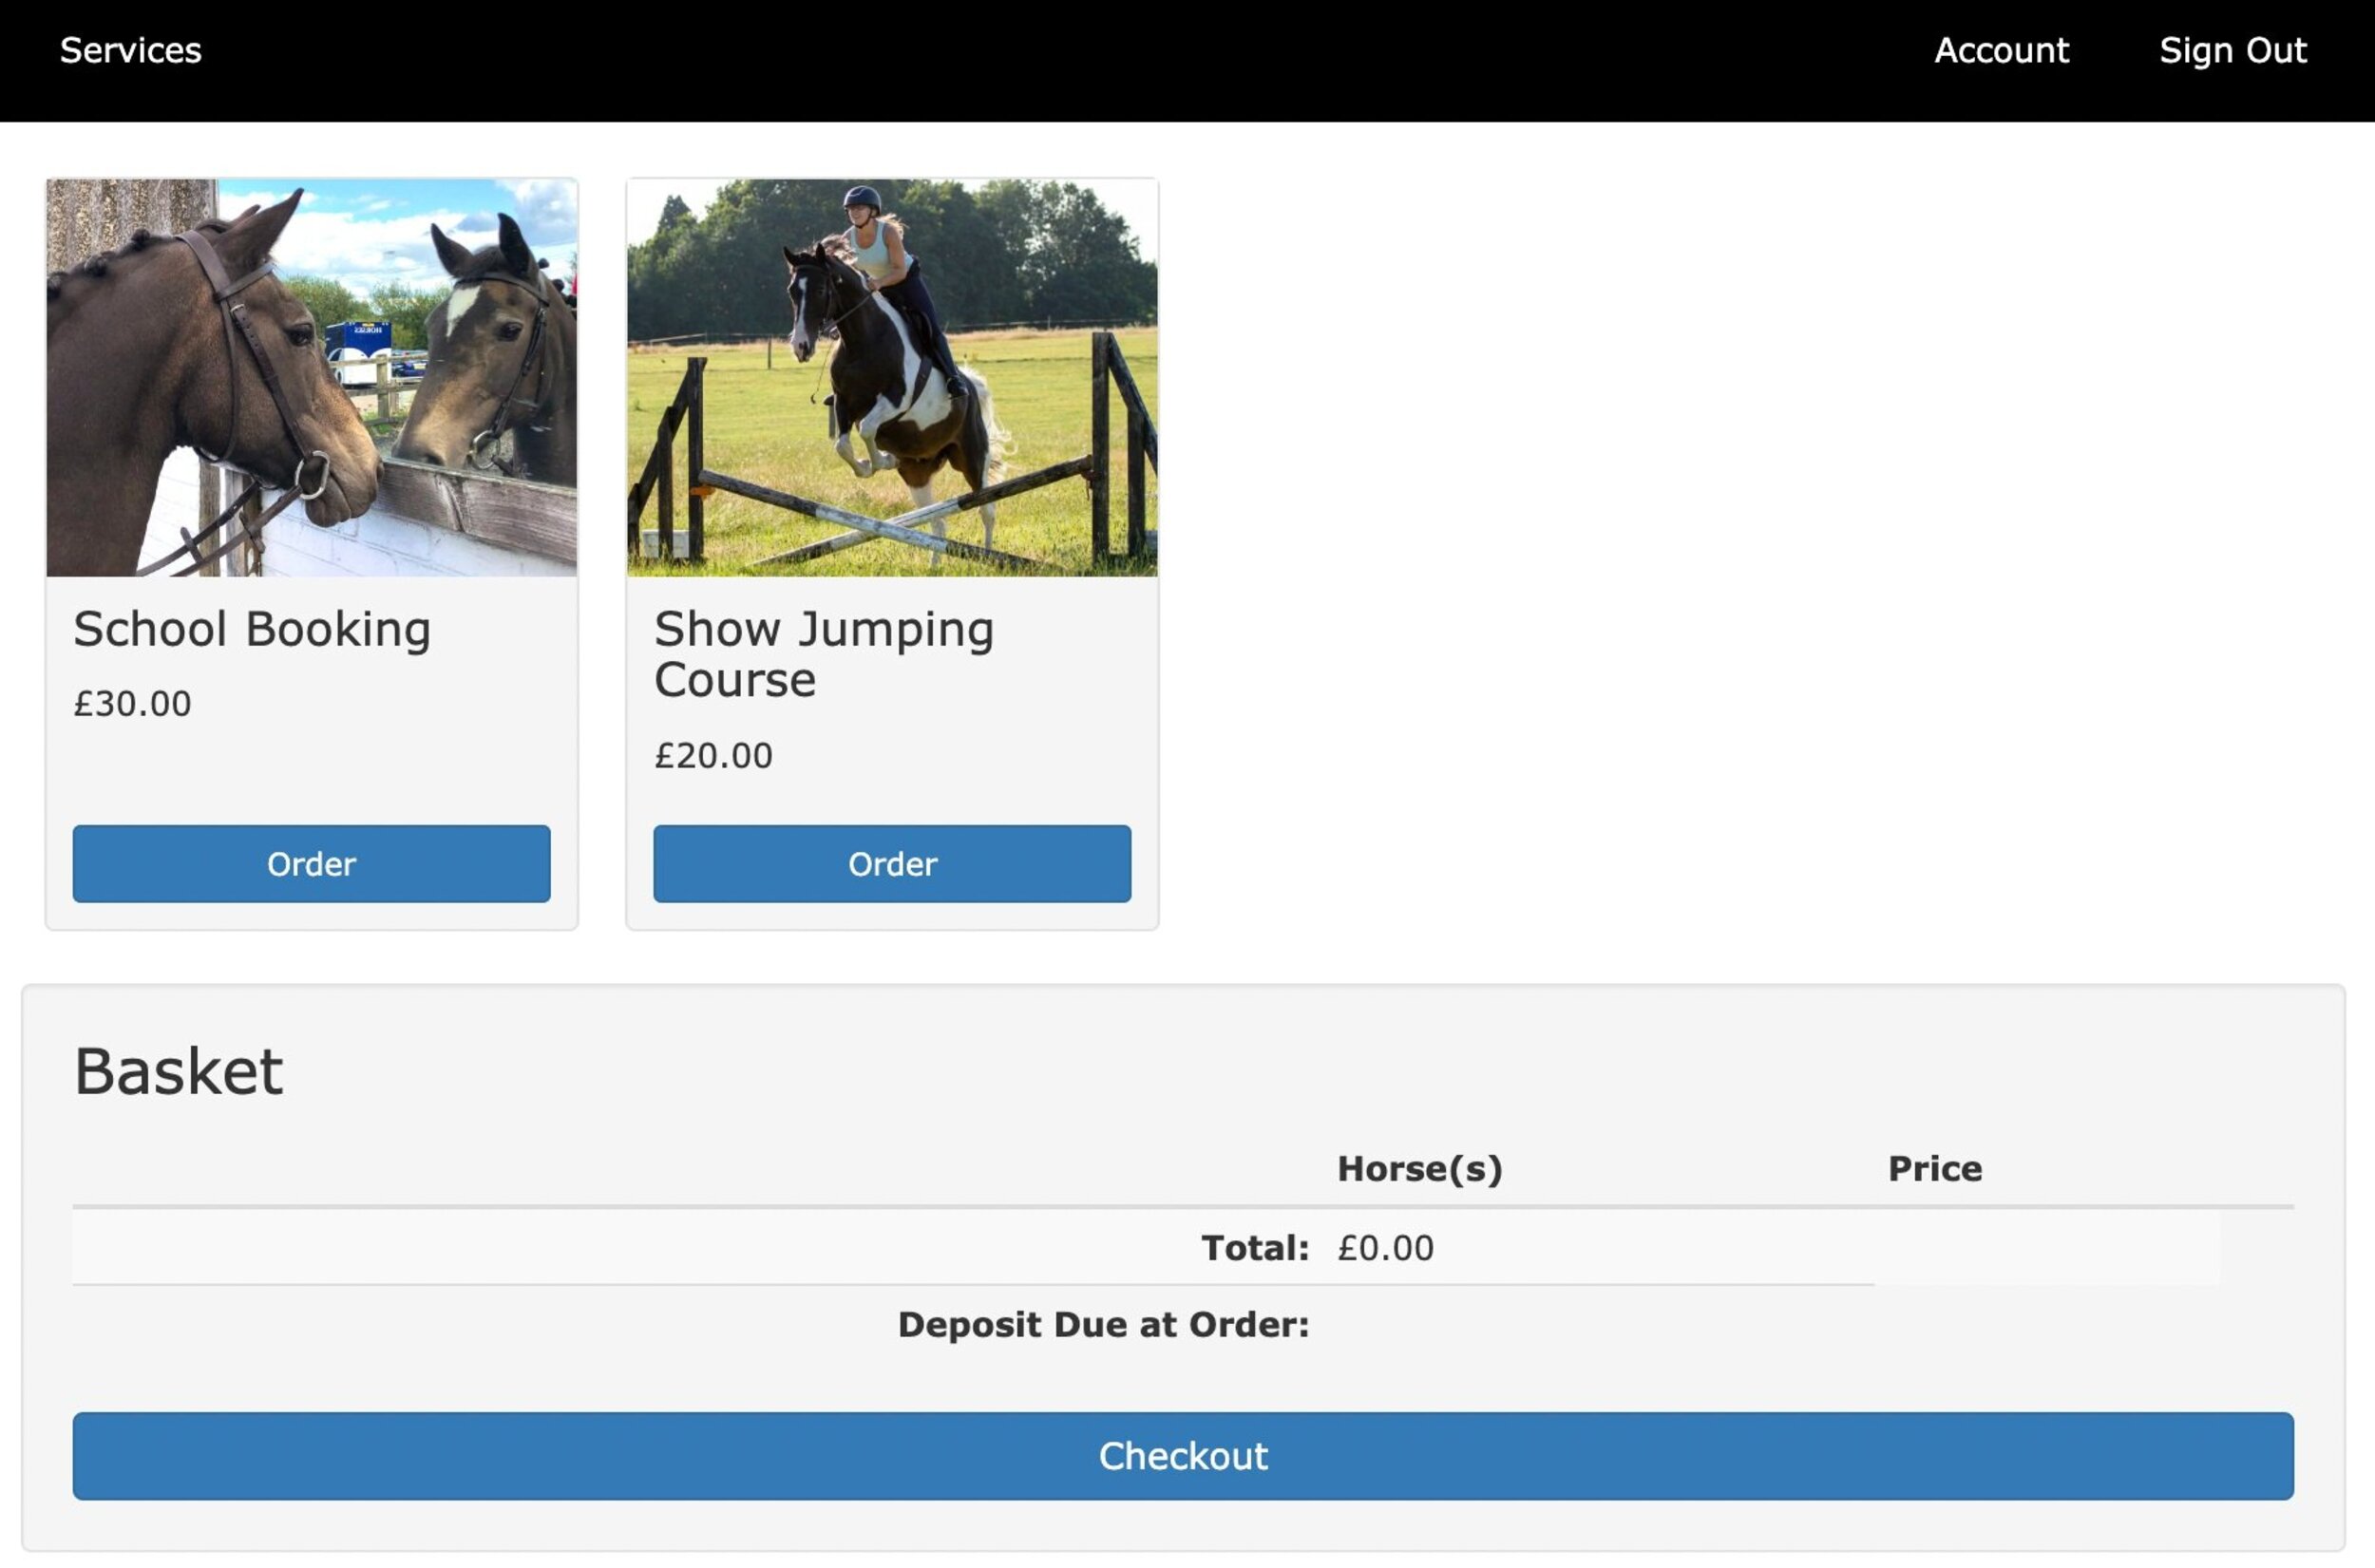
From a customer perspective not much has changed. As shown above, the service page is now much cleaner and it is much easier to find what you want.
Once the customer has chosen the service they want (and when they want it) they’ll be asked to select the quantity of horses for the booking. This is done using a simple drop down box, from which the customer can select the number of horses (and at the same time see the different price for each option).
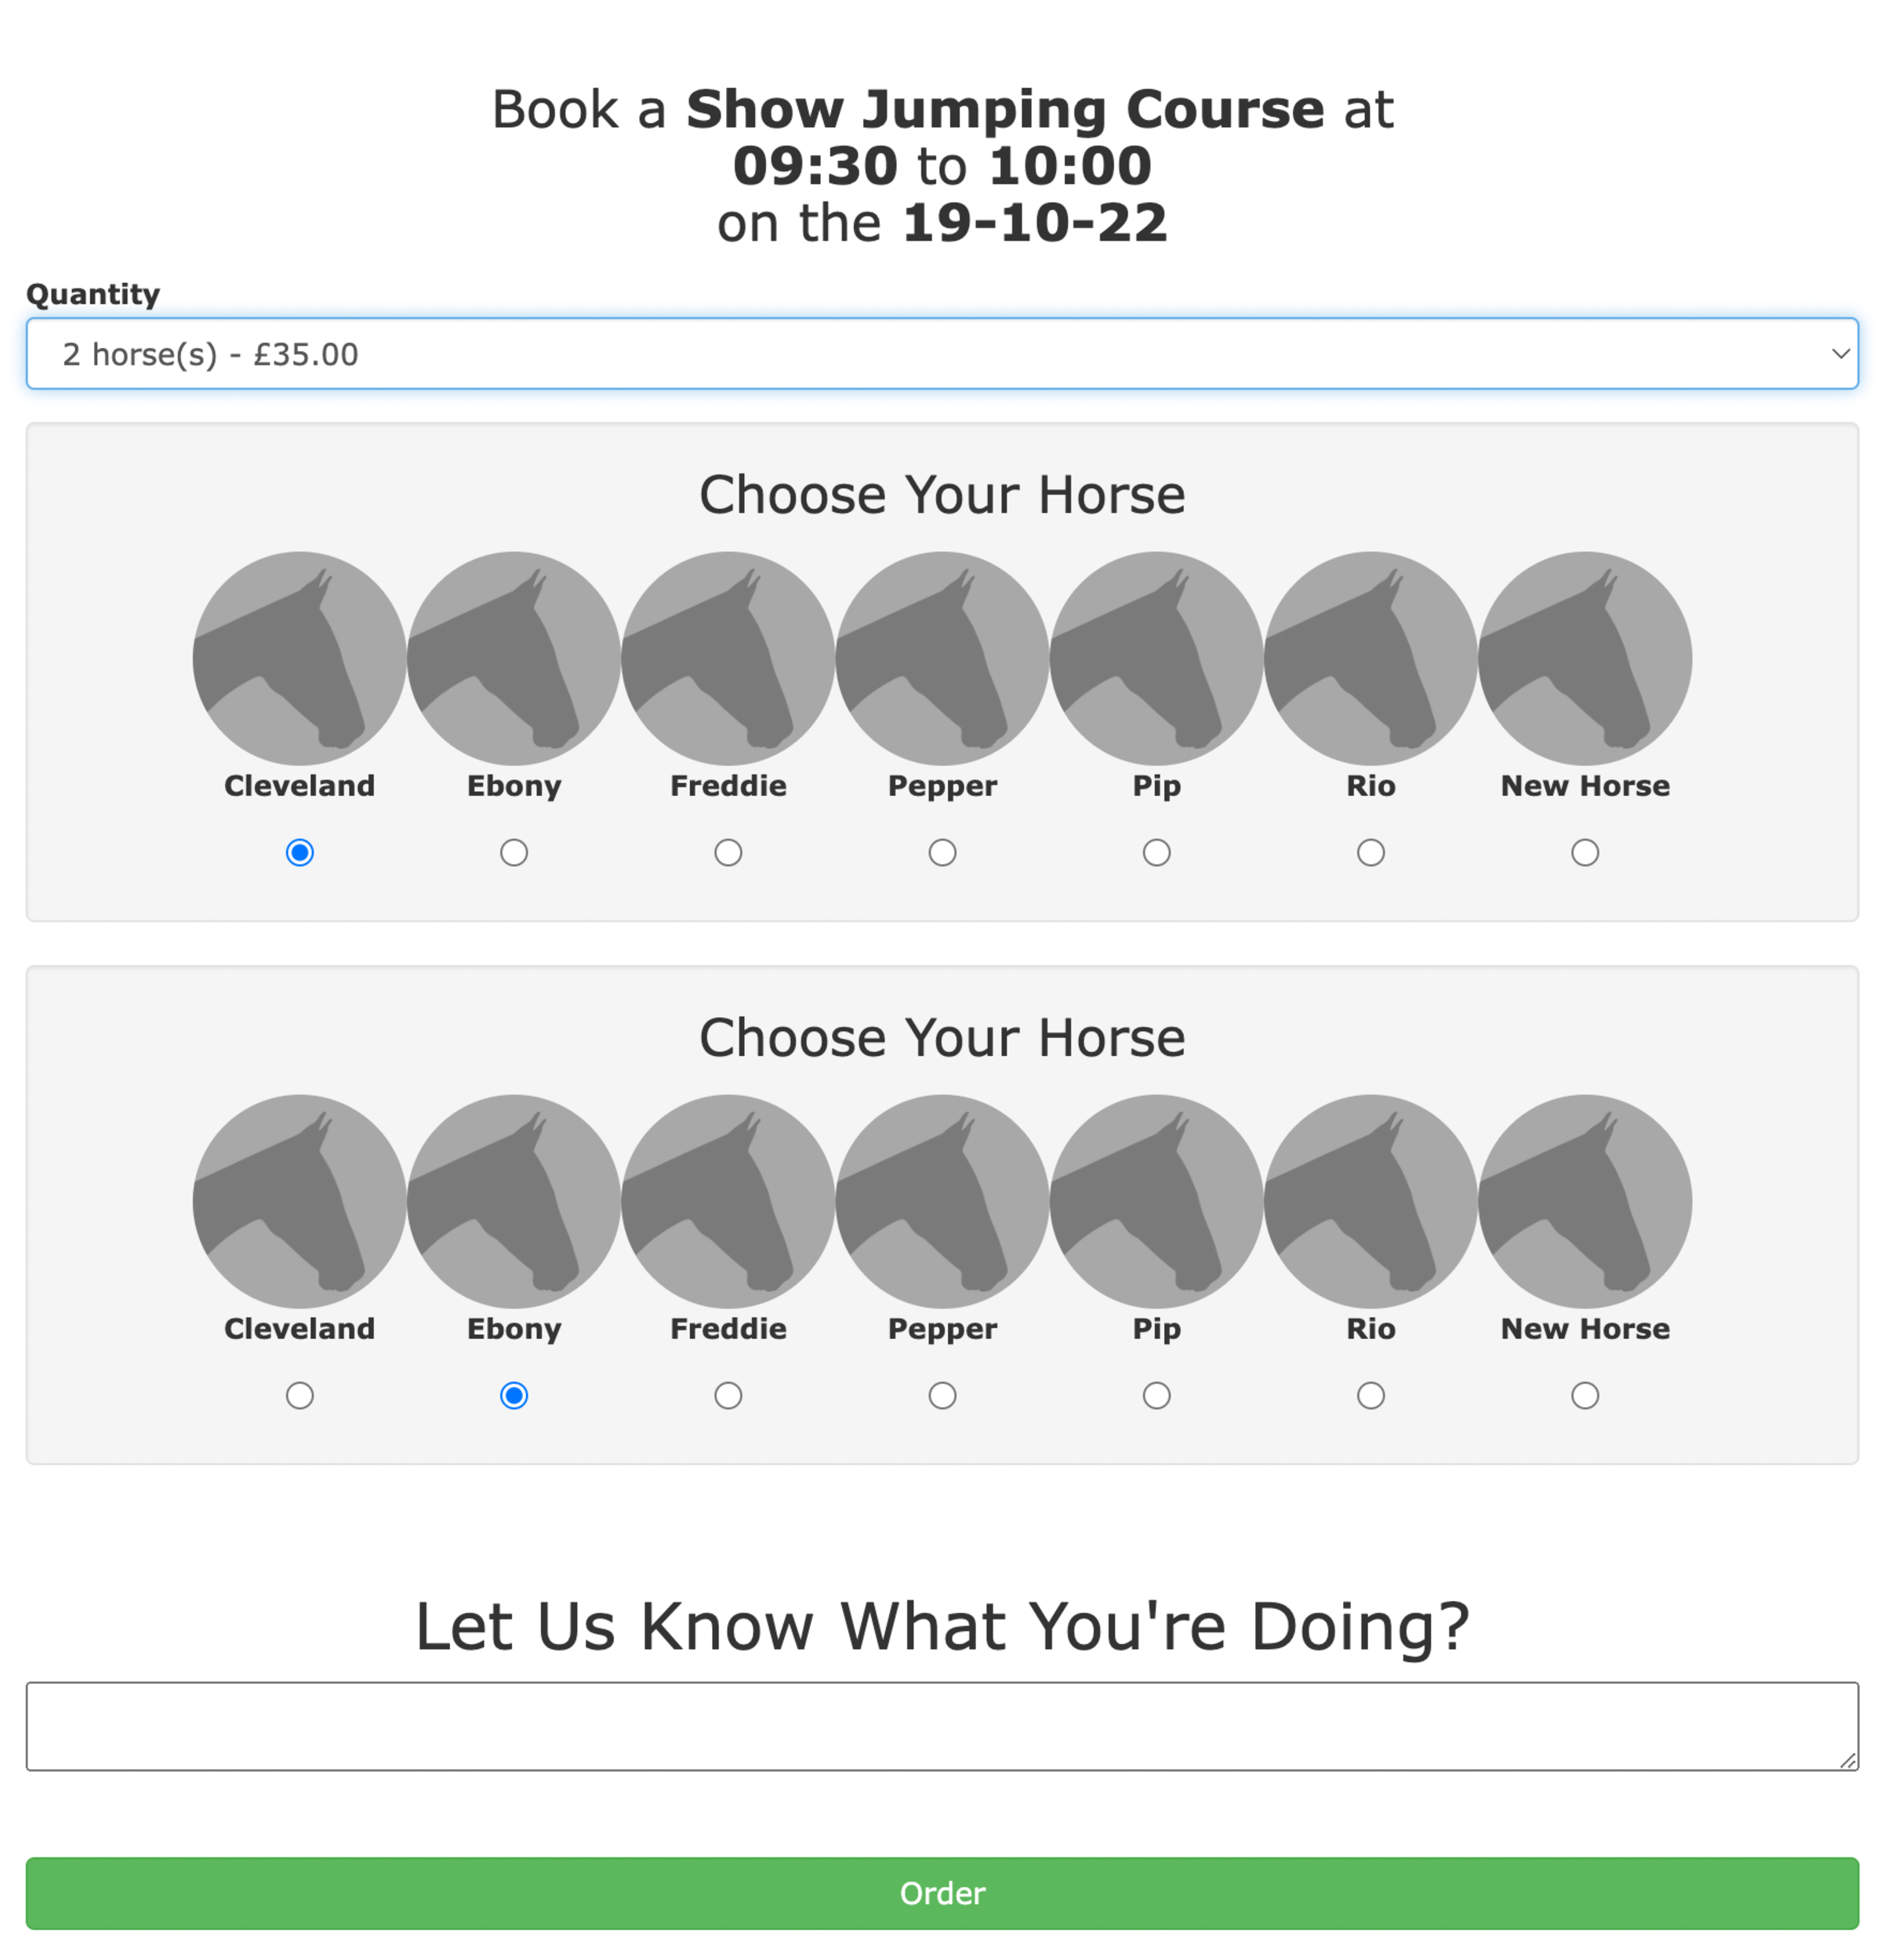
Once they’ve made their choice they’ll get to select the name and details for each of the horses they’re bringing with them to the booking. Finally, when they’re ready, they can add it to the basket and they’ll be ready to go to the checkout (or order more services).
Setting up pricing options is done from the service publication view within the shop management page in At The Yard. To get started find your existing service and click on Edit or Publish a New Service.
As before the base price (for one horse) needs to be set first. But now a new section, Pricing Options, has been added. By default this section will be empty but you can add as many options as you want by clicking on the blue + button at the bottom of the section.
Within each option you need to select the required number of orders (the number of horses) along with the associated price and deposit.
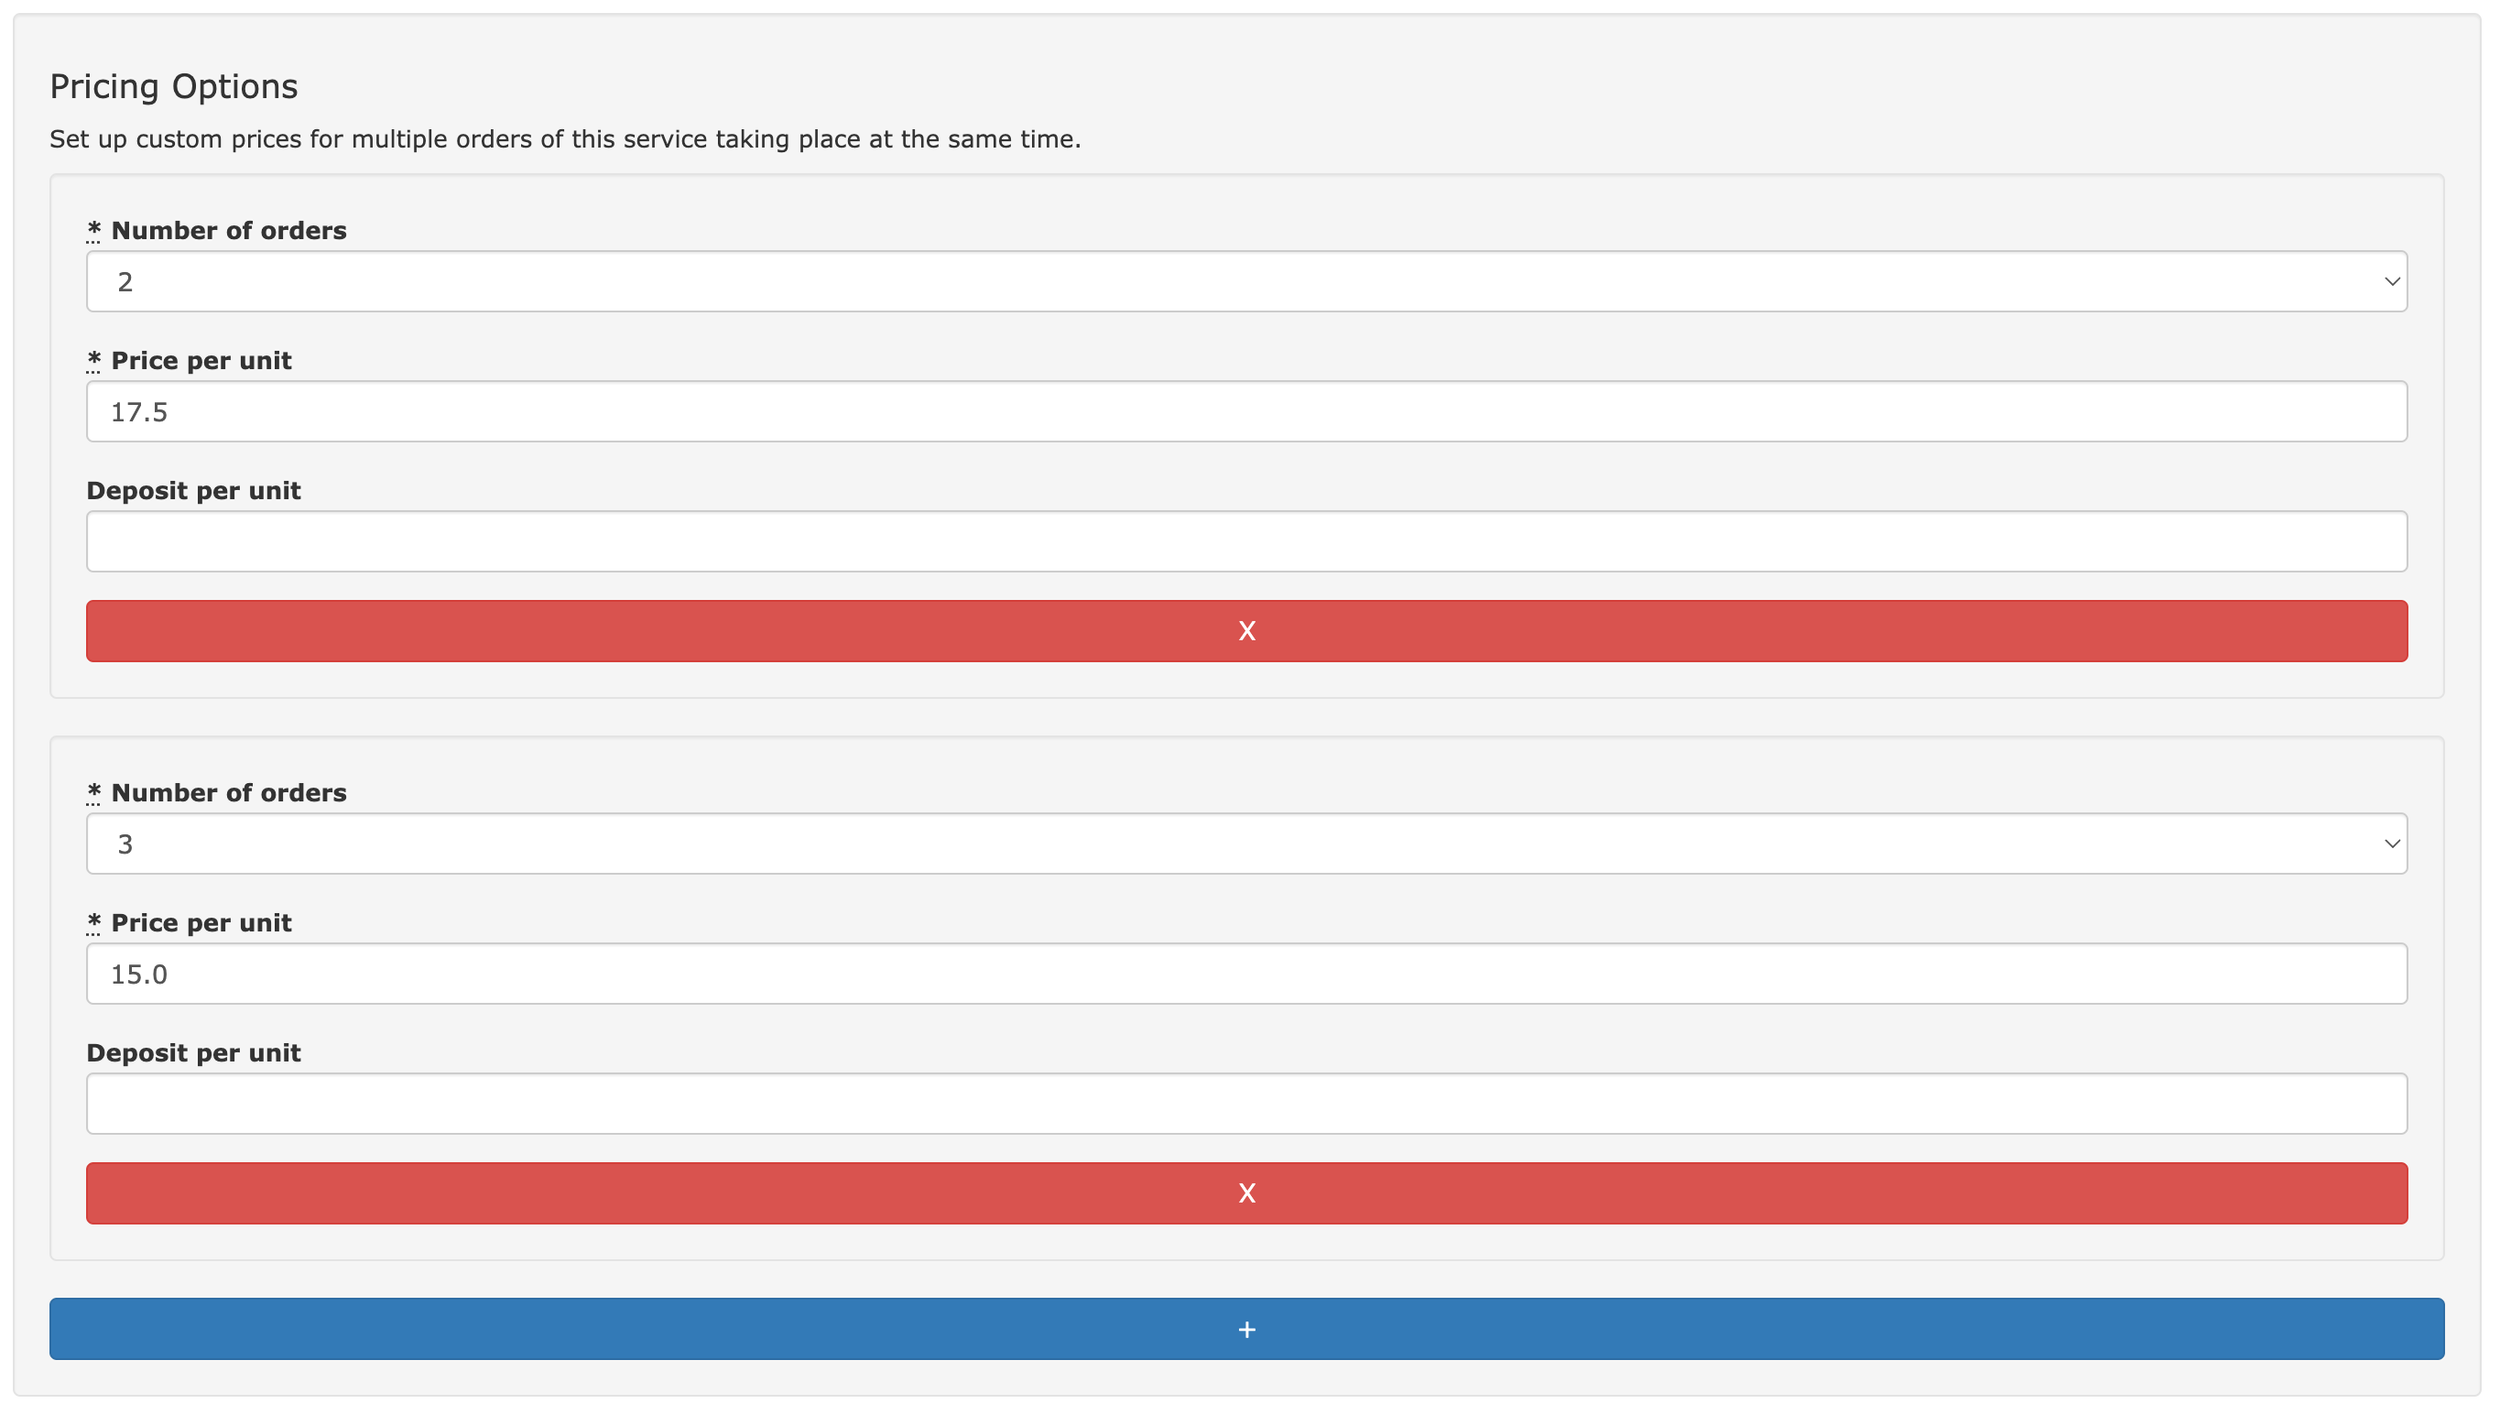
When you’re finished, click save and these will be ready for your customers to use. You’ll also be able to see an overview of your pricing options in the published service list under shop management.

Pricing Options are an example of an update we love in At The Yard - one that improves and refines the experience for your customers!
As we mentioned at the start of this post this is part of a multi-part series highlighting updates that we’ve brought to the shop since it’s launch, so check back soon for the next update.

When someone in At The Yard makes a request, subscribes to a service or books a facility it’s important to inform staff so they can act accordingly. Until now we only offered one option to configure this for your yard - to turn the notifications on or off for all staff…
This worked, it made sure that everyone got the information they needed, but what if you wanted to stop notifications going to certain staff members. For example when:
Well today we’re making this possible. We’ve added a whole bunch of configuration options so you can use notifications the way you want to. From so granular that a single staff member can be assigned to a particular service through to the existing ‘message every member of staff’ that we’ve had until now.
Lets look at the options now available:

All these configuration options are done on the Yard Configuration screen under the Notification Settings section.
This is still the default option. So if this is what you want you’re already done!
Click on the Edit button. Tick the box “When a request is made in the system notify all members of staff?”
This option must be turned on for any staff to receive notifications with the other options.

This sets which staff will receive the staff notifications.
The existing options are shown in the Notification Settings pane and to make changes you can click on the Edit Staff Settings button. Simply tick/untick the appropriate staff members and click save.
This option works in combination with the previous option. It sets the defaults for new members of staff to ensure that they automatically receive the correct settings (one less thing to remember when onboarding new staff).
The final option gives you the finest control over who receives the notification, allowing only the user assigned to a service to receive the notification.
This is perfect for situations when a single member of staff is responsible for a particular service (for example Rug Washing or a Lesson with a particular member of staff). They can be set to receive all requests, manage approvals and confirm fulfilment whilst not adding additional clutter to the inboxes of users who are not involved.
To set this up simply enable the ‘If a service has been assigned to a user then only email them instead of all staff’ in the notification settings panel. Then existing assignments will automatically be used or you can create new ones via the Forecast panel or by going to Admin, Services and clicking the new option under the edit drop down called ‘Assign User to Service’.
To check on or remove existing assignments, these can be seen under the management menu tab by clicking on the assignments button.

Todays release includes a collection of Quality Of Life improvements to the invoicing system in At The Yard. These are designed to make your life that extra little bit easier each and every time you have to send your invoices. Individually they’ll save you few seconds but together and when repeated over every invoice they’ll save you a significant amount of time.
When you send an email regarding an invoice (this applies to new invoices sent from today) to your customers you can now see when and to which email address the notification was sent to.
In addition to this it’s now clearer on the invoice overview page if you’re sending an email regarding an invoice for the first time or if you’re sending a reminder.
When you record a payment on an invoice you now have the option to show the payment on the invoice itself and update the remaining amount owed for that invoice.
This setting is off by default. To enable this option go to Yard Configuration and click on Edit Invoice Settings. You’ll see an option called Show payments on invoice which you can check to enable this setting.
We’ve created a new option in Invoice Fields called Invoice Mid Text. This option allows you to include a short piece of text after the contents of the invoice but above the footer. This is ideal for including payment information directly on the invoice but you can, of course, use it for whatever you choose.
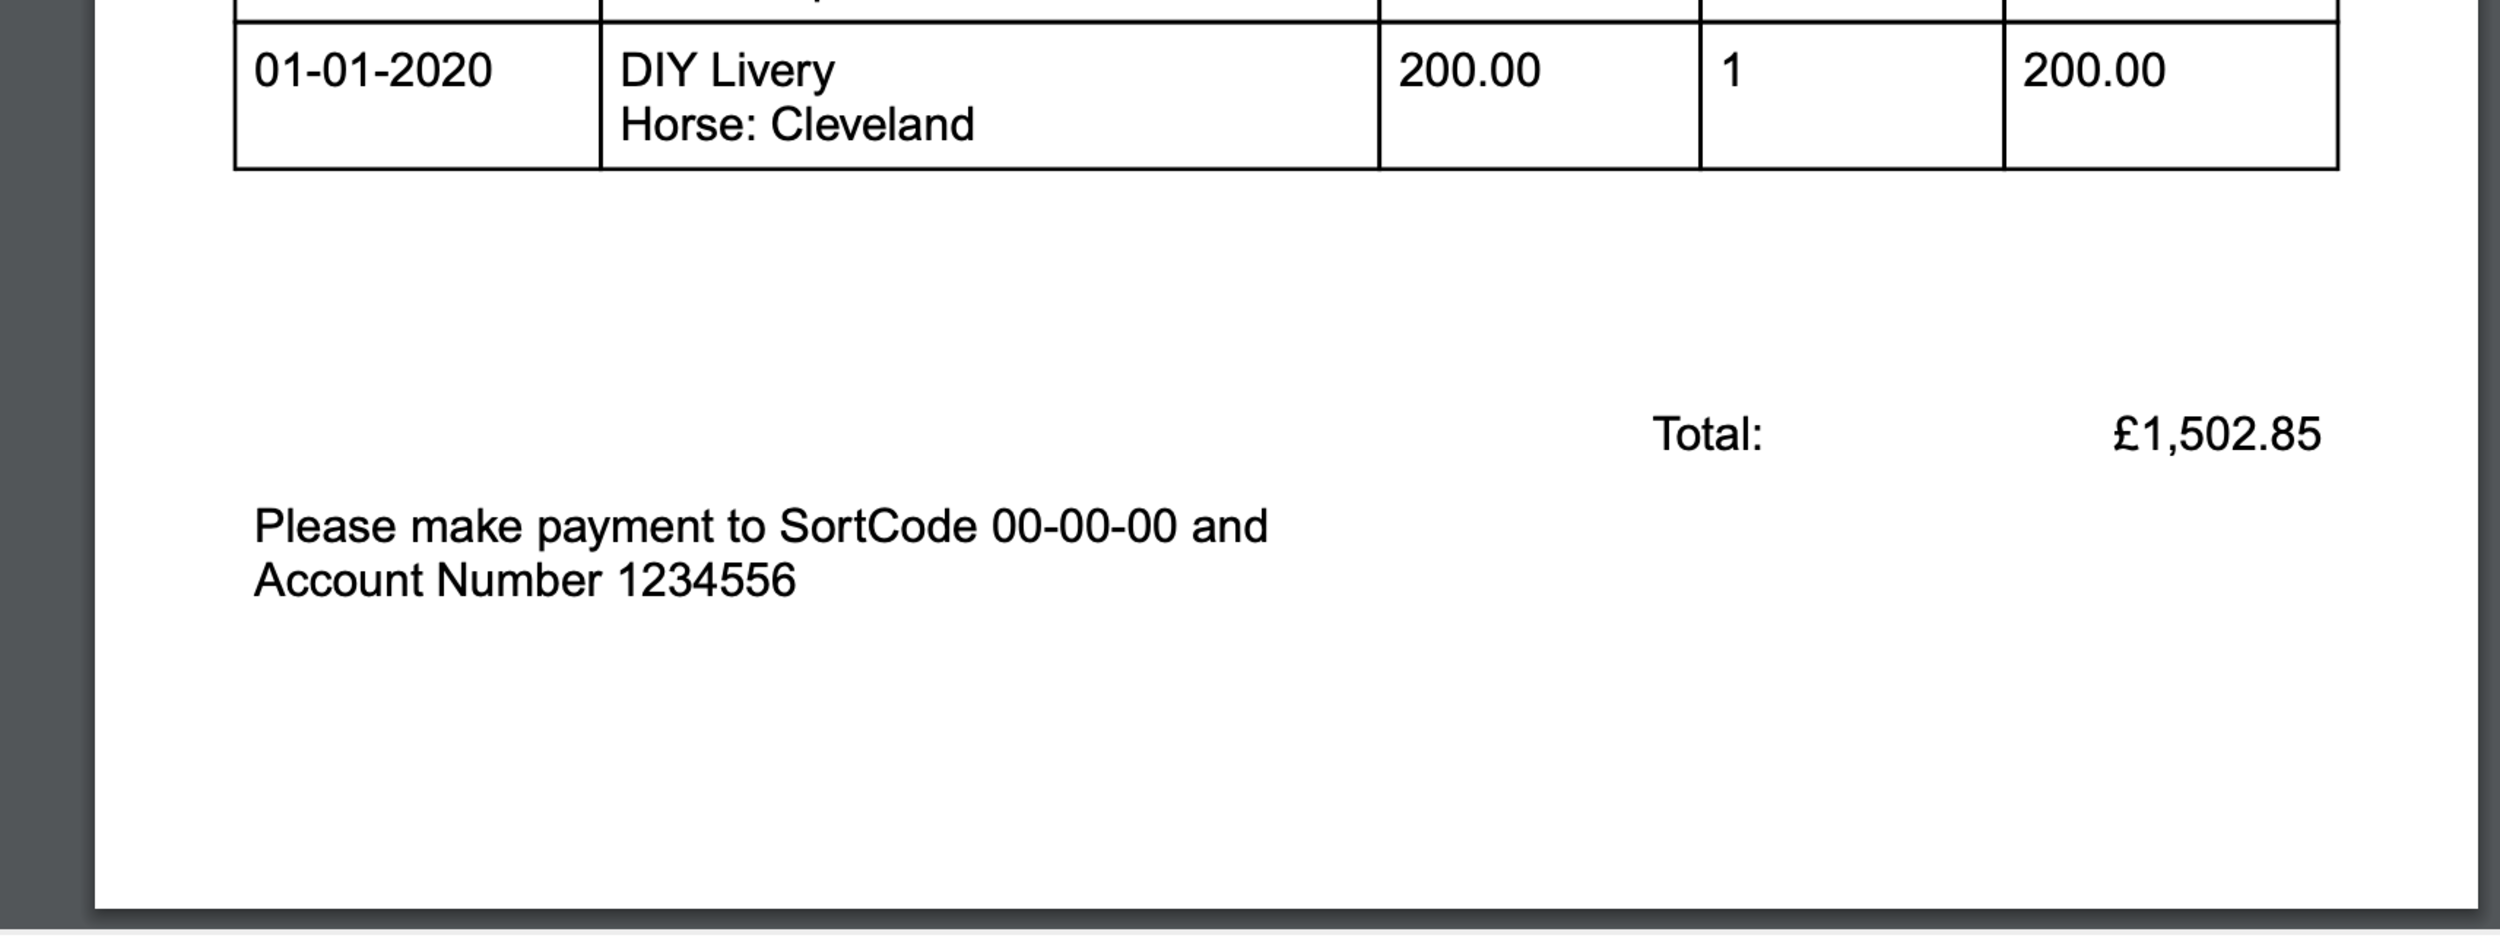
Barn names are available in At The Yard to record the formal name of the horse but display the name they’re known by day to day.
We’ve now added a new option available under Invoice Options to use the horses Barn Name when creating an invoice.
When creating an invoice you sometimes want to make a simple change to the text or price of the item. By visiting the Charges screen under the admin menu you can now click edit on any charge that has not yet been invoiced and make the needed changes.

We’re adding an additional option to the Invoice Grouping Options called Month of charge. This allows you to group similar items on an invoice by the month they’re in. This is in addition to the existing option Date of Charge which allows you to group similar items on an invoice irrespective of the date (or month) they’re in.
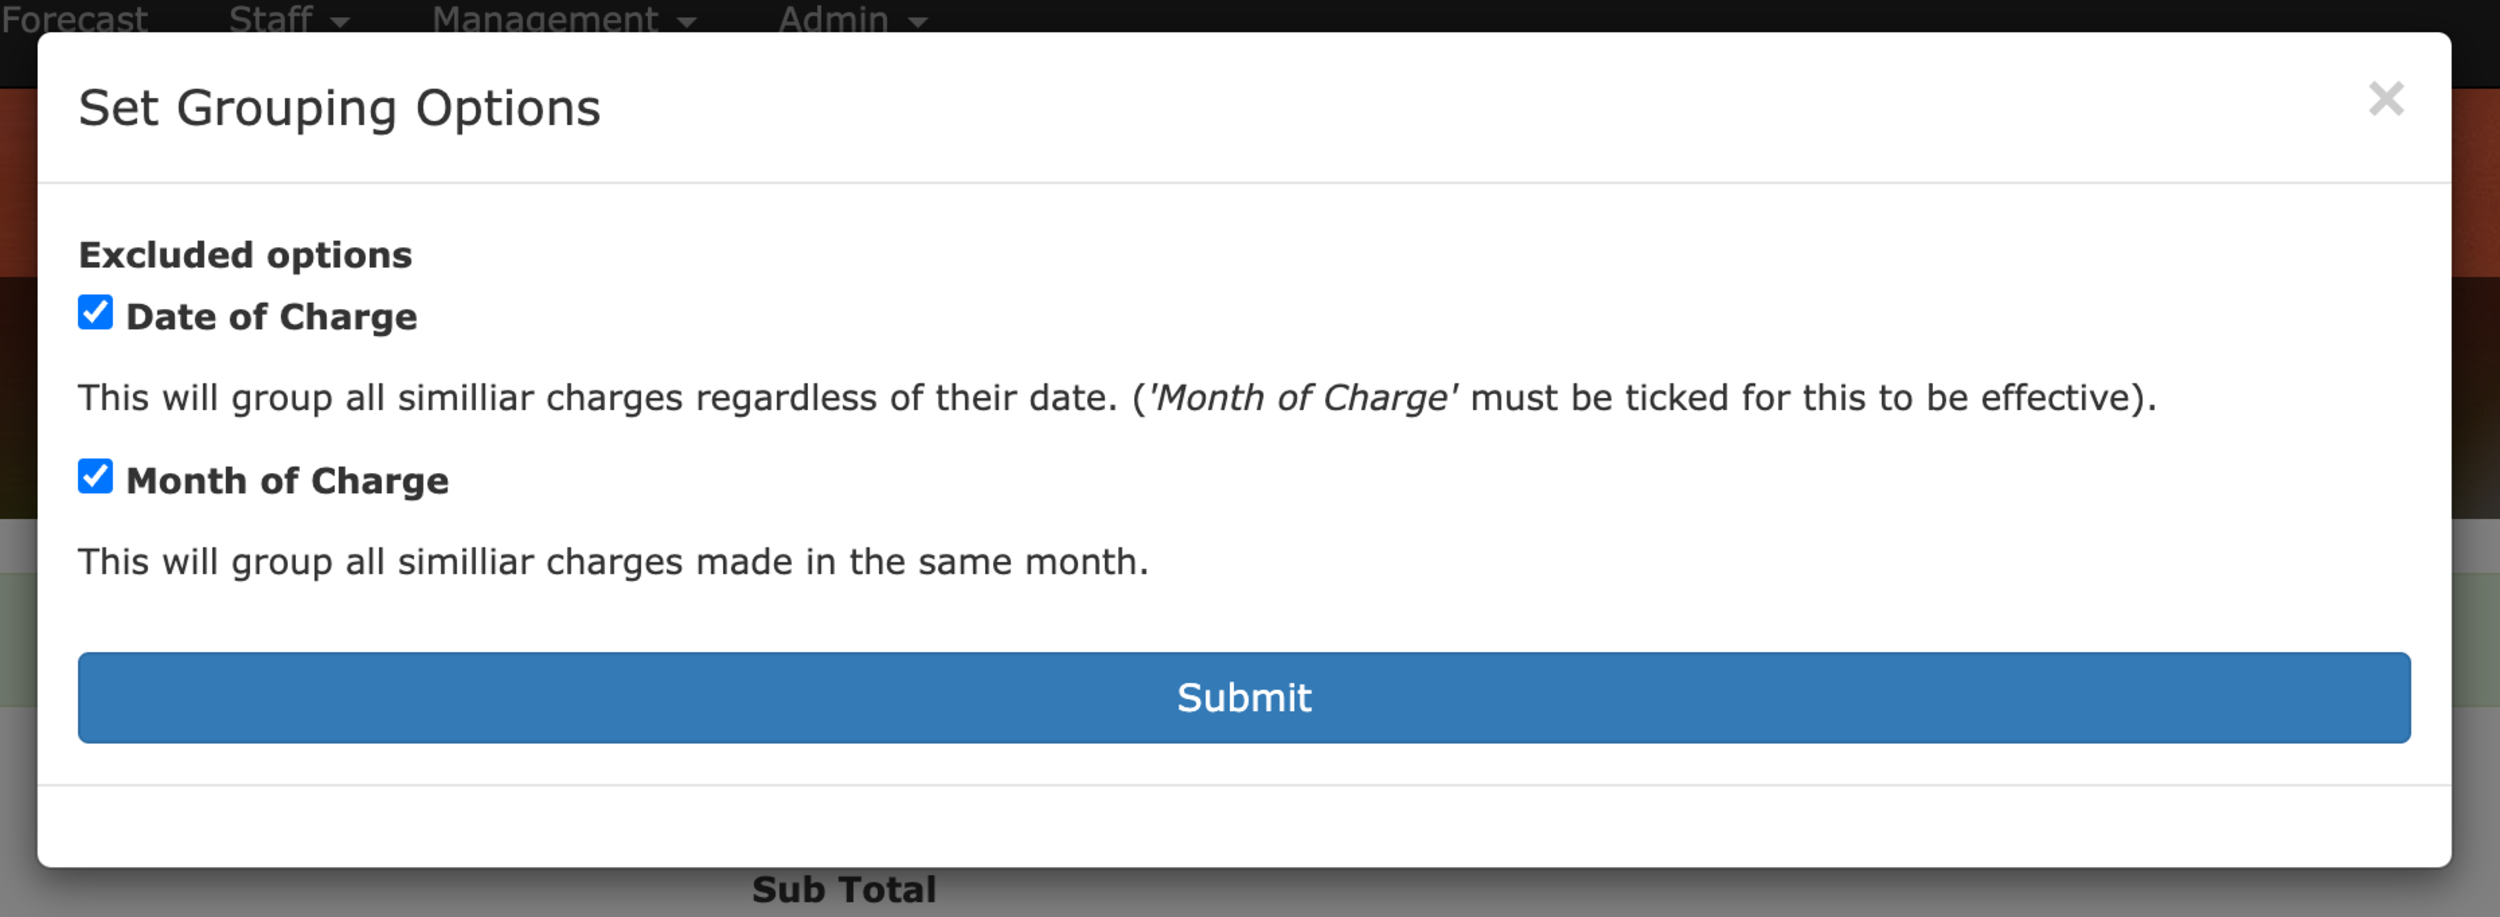
When you’re creating a new invoice it’s common practice to send out a months worth of charges at a time. However if you’re running a few days behind this can be a frustrating experience as you’ll have to manually deselect any additional charges that have been raised in the meantime.

The Select By Month Buttons
To help with this we’ve added buttons at the bottom of the invoice preview to automatically select all the charges for a specific month whilst deselecting everything else. Making what could have been 10’s of clicks into a single click!