


Today we’re announcing our biggest update to At The Yard since our initial launch. It’s a feature we’ve been asked for time and time again and one we couldn’t be more excited to bring to the community. Today we’re announcing the ability to manage and run a public facing online shop directly from within At The Yard.
Work on the shop started over 2 years ago and has incorporated an extensive 1+ year invite only soft launch where we’ve been testing, refining and improving everything ready for todays wider launch.
Let us begin with a quick video to show you how easy it is for anybody to make a purchase.
As you can see making a purchase is quick and simple. And with the option of creating an account your customers can save even more time in the future.
Here’s a quick list of the features you get with our public shop feature:
The next thing you need to know is that unlike other products on the market we don’t charge a ‘per booking’ fee. We don’t want to penalise you for selling more (in fact we want to support you to sell as much as possible) and so we offer simple transparent packages so you know exactly what you’ll be paying us for the service. (Please Note: There is still a card processing transaction fee but that goes to the card processor not us).
For that card processing we have selected Stripe as our supported payment processor - they are well recognised, trusted by a number of very well known brands and organisations and offer competitive rates on transaction processing.
The good news? If you’re already on one of our larger packages the public shop is included as part of your existing subscription. You’ll just need to drop us an email to enable it on your account and you’ll be good to go.
For our smaller packages there is a small add on fee to give you full access to the public shop system - again just get in touch and we’ll add it to your account.
To find out details for your specific package check out our pricing section or get in touch and we’ll let you know.
We’ll be posting how-to’s and further updates in the coming weeks so watch this space to find out more.

In March 2022 we released the shop feature for At The Yard after more than a year of testing. It’s allowed our customers to reach a wider audience and create more opportunities for their customers to use and benefit from the facilities and services they offer.
But we didn’t want to stop there, we had more ideas to add new features and improvements which we’re highlighting in this series of posts.
This is one post of a part of multi part series of blog posts:
The obvious question you’ll be asking is; why do we need to do anything special to support the Channel Islands when it comes to the shop feature in At The Yard? Well the simple answer is money, more importantly taking payments and making sure you get paid.
As part of the checkout process, for any user of the shop, anywhere in the world, there needs to be a way of taking payment. Typically this is in the form of a debit card, credit card, or their equivalent being supplied to make payment. To facilitate this we use a payment processor - a company who acts as intermediary between At The Yard and everything to do with the actual act of taking the money and sending it to your bank account.
We use a payment processor because these companies dedicate their entire business to this specific task (in the case of Stripe processing 100’s of billions of pounds worth of transactions every year!) meaning they’re very very good at it! Their focus and their scale gives us confidence when taking payments and in turn gives your customers confidence in entering the card details.
Whilst we’re very happy with our existing payment processor they, like all companies, choose where they operate and unfortunately they don’t support the Channel Islands.
This left us with a few different options.
This was never an option we considered seriously - our customers in the Channel Islands should get the same set of features as we offer in mainland UK and all the other regions that At The Yard supports. As we had no plans on changing that we had to find a solution.
One option that we could have considered was acting as an intermediary between our yards in the Channel Islands and their customers. Whilst this would have worked it didn’t feel right to us.
Our philosophy is that your customers are your customers and your money is your money. Placing ourselves in the middle just didn’t feel right to us and so we decided it wasn’t an option we wanted to go with.
The final option was to review alternative payment processors to find one that would support the Channel Islands. If we could find one - we felt this would be the best option. It meant that we could support our customers whilst keeping them in control of their customers and their money.
Of course, as is often the case, the right thing is not always the easy thing! To support an additional payment processor meant that we’d have to completely re-engineer how the payment system worked to allow for a choice of providers to be supported.
So we bit the bullet and decided that adding an additional payment processor, whilst the most complicated, would offer the best experience. We spent the engineering resources and reviewed the available providers and settled on SumUp. SumUp is a popular payment provider that importantly already supports the Channel Islands.
Fast forward to today and the work is done and we’re pleased to announce that we can support At The Yards’ Shop feature in the Channel Islands.
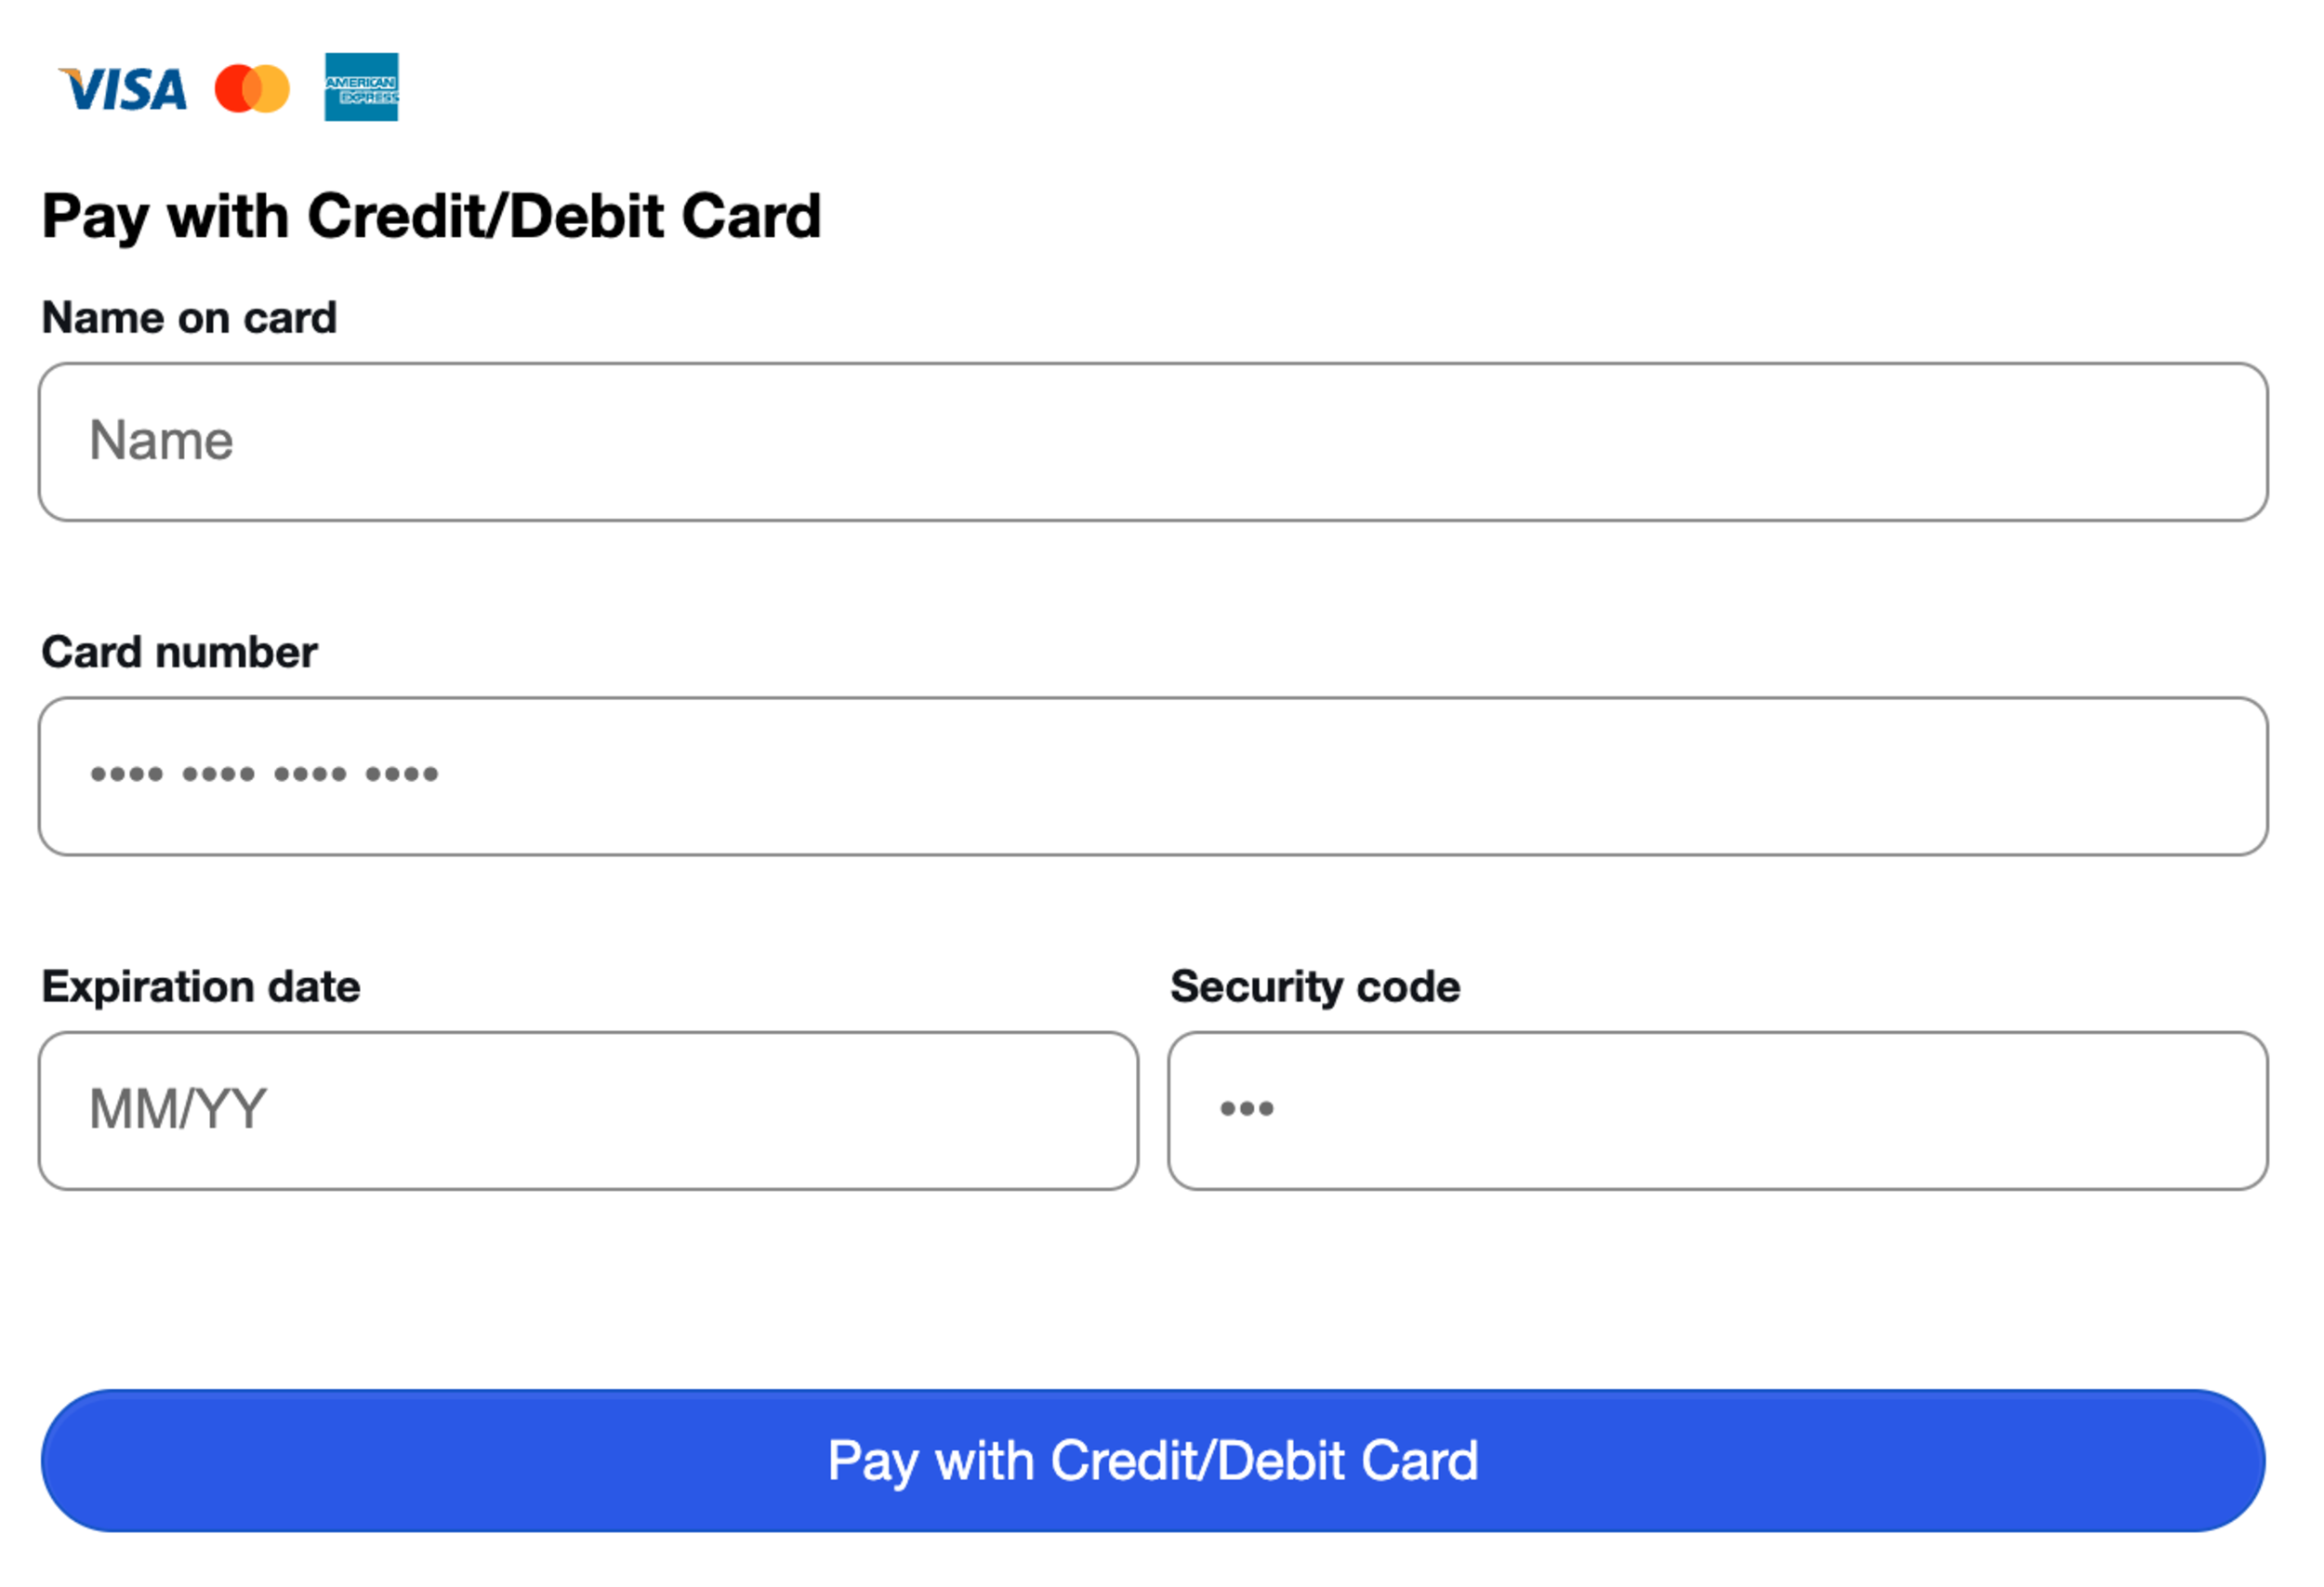
For the end users, your customers, the experience is very similar - with the only significant difference being in the screen where they enter their card details. Oh, and Apple Pay/Google Pay - sadly we can’t use these at this time but will add it when/if it comes to SumUp online checkout.

|
|
|---|---|
| Stripe - Checkout Page | SumUp - Checkout Page |
All in all we’re delighted with the end the result and that we could maintain feature parity across the regions we support. All whilst doing it in a way we’re proud of.
If you’re an At The Yard customer in the Channel Islands (or looking for a Yard management solution with a public facing shop) please get in touch - we’ll enable the SumUp integration for your account and you can be up and running soon after.
Making At The Yard easy to use is something we’re always working to improve. Today’s update represents a huge improvement to the experience of our new customers setting up At The Yard for the first time.
We’re announcing our new Yard Setup Wizard. This new feature will help get new yards up and running in At The Yard in record time. It allows you to setup the following in a matter of minutes:
Take a look at the video below to see just how easy it can be to get At The Yard up and running for your yard.

We recently launched an update to the rota system in At The Yard that expanded functionality to let yards organise everything from staff rotas through to who’s turn it is to clear the paddock.
But what if you still need more?
Well that’s where integrations come in. Like At The Yard is with livery yards there are companies who’s focus is 100% on building the best software for creating and managing rotas.
Through integrations you can pick the best software available for rotas and bring that data into At The Yard where it can be easily displayed to your customers on the dashboard.
RotaCloud (https://rotacloud.com/) was the clear choice for us to support as the initial 3rd party rota System to integrate with At The Yard and we are excited to be announcing the launch today.
RotaCloud is based in the heart of Yorkshire, UK - and who better to tell you about themselves than themselves:
Having been on the receiving end of more than a few poorly managed work rotas themselves, RotaCloud’s co-founders David, Joel and James decided to come up with a solution. They pooled their skill-sets and got to work building an app that would let managers create and share rotas in minutes, regardless of their experience of rota management or technology. Cut to today, and RotaCloud is used by more than 3,000 businesses all over the world, saving managers time, helping businesses grow, and making life easier for their staff.
- RotaCloud - https://rotacloud.com/about/
Before you get started you’ll need to make sure you have:
To start the setup you need to go to the Integration Configuration page by clicking the button on the Admin ➔ Yard Config page. On this page you’ll see a section called RotaCloud Integration and a button you can press to enable the integration. Once you’ve clicked it you’ll see the following screen:

Next you’ll need to create an API key over in RotaCloud. You can do this by going into RotaCloud, go to the settings menu and go to the 'API & Webhooks' section. Create a new API key called At The Yard and copy and paste the API key into the box in At The Yard and click Store Key.
At The Yard and RotaCloud are now connected.
The next thing to do is link your staff users in At The Yard to your Employees in RotaCloud. To do this click on the Manage Contact Links button.

You’ll need to go to each staff member’s row and select the corresponding employee name from RotaCloud in the dropdown box. When you’re ready click on Create and it’ll setup all the links between the users and the employees in the two systems.
Your rotas will now be set to synchronise - this updates every 2 to 3 hours so you may have to wait a little while for the first synchronisation to take place. Once the first synchronisation takes place your rotas will show up under the Management ➔ Rota page. To let users see them you’ll need to go into the manage section for the rota and check the Publish checkbox (you may also want to check the Show in Forecast checkbox depending on your needs).
Congratulations! RotaCloud is now setup and syncing data with At The Yard and you can start benefiting from both systems working as one.

We introduced the Rota feature to At The Yard in late 2019 (read more here). It allowed yards to organise their recurring tasks and show them to their staff and customers within At The Yard. We later added the ability to add times as well as days but, beyond that, the Rota feature has stayed pretty much the same. This has worked well for the customers who’s needs were met by this narrow feature set but we wanted to make it more useful for more of our yards.
In particular we want to make Rota’s more useful as Staffing Rotas. So today we’re excited to release an update to Rotas to make this possible - focusing on two significant areas; a new type of Rota and a new way to display the Rota.
Dates have only been supported up to now by giving a rota the title of the day of the week it was applicable for but this wasn’t ideal stopped yards from really using this feature.
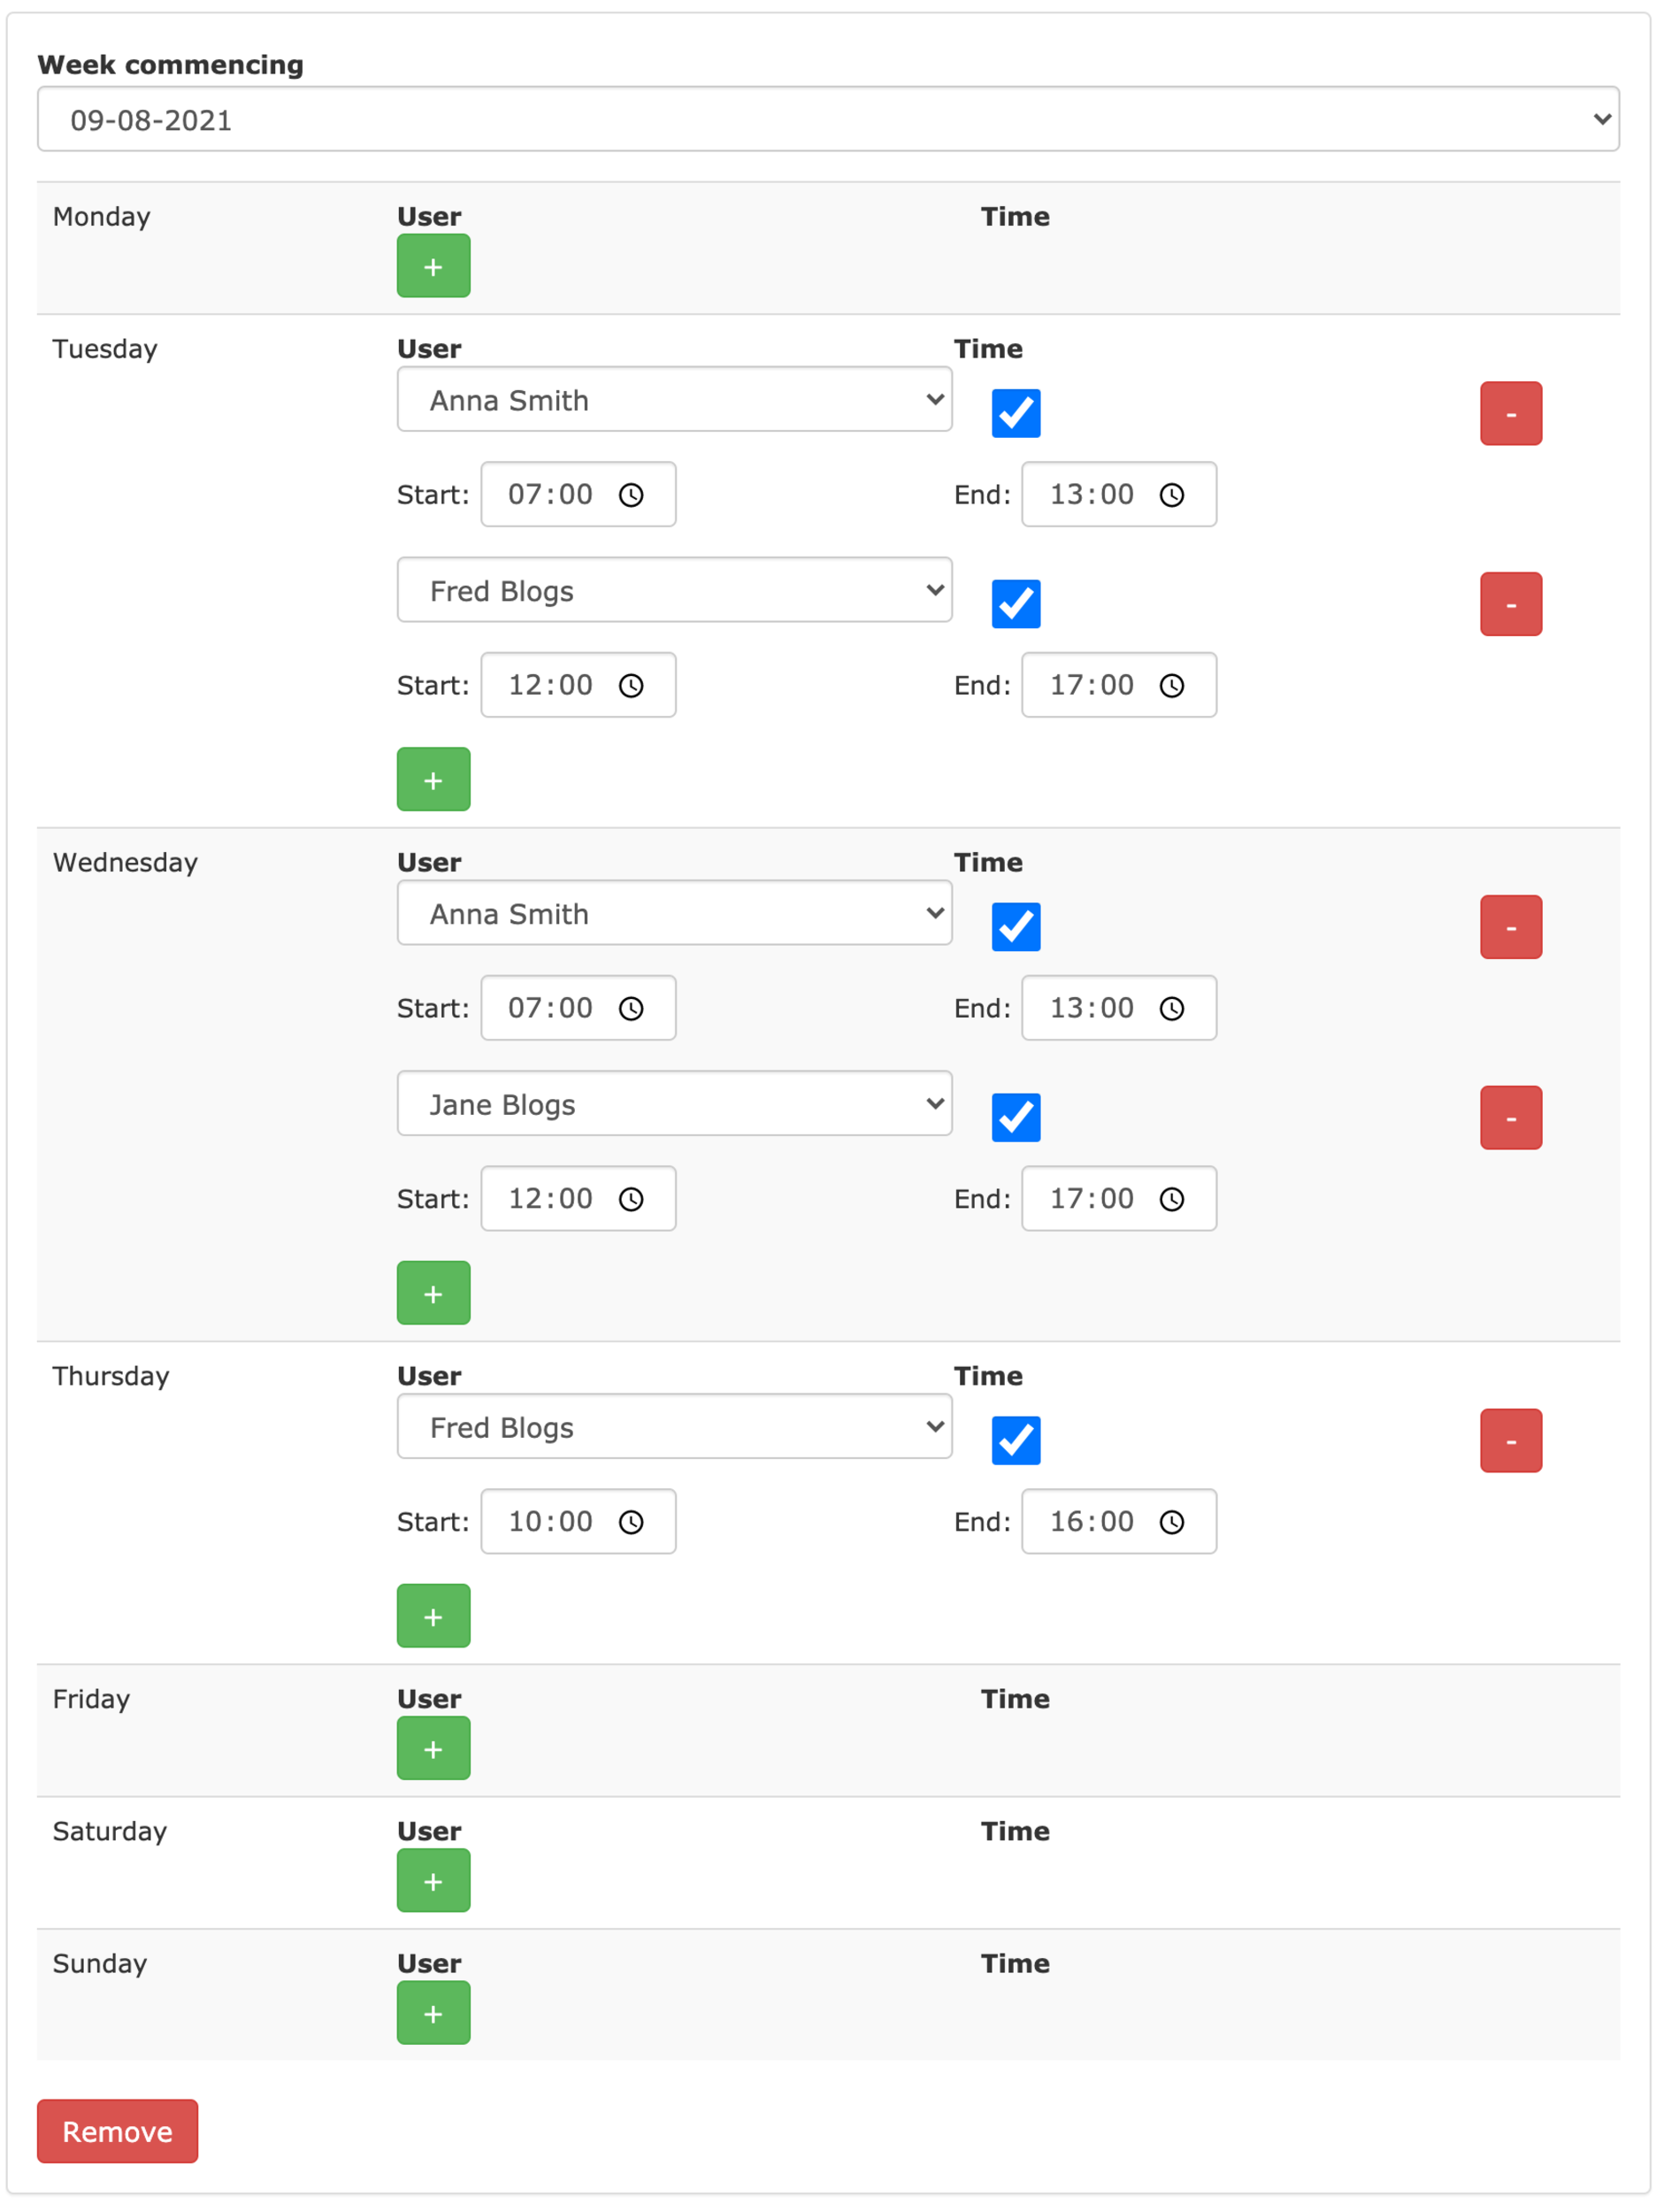
To make what we wanted to do possible we added a new rota that is ‘dated’ rather than ‘named’, it’s called a ‘Week Commencing’ Rota.
This Rota type allows you to create a Rota for a specific week. Simpler and clearer for you and your users and it means we can do much more to help organise and manage your Rotas for you going forward.
The calendar (and the today view) have become a central part of At The Yard. It’s the first thing people look at whether they’re on their phone, computer or at a kiosk at the yard.
With this in mind we’re making it possible for Rotas to be shown on the calendar (for both ‘Week Commencing’ and ‘Named’ Rotas).
Just by being able to make a Rota so much more visible we think it’s going to change the way yards use this feature.
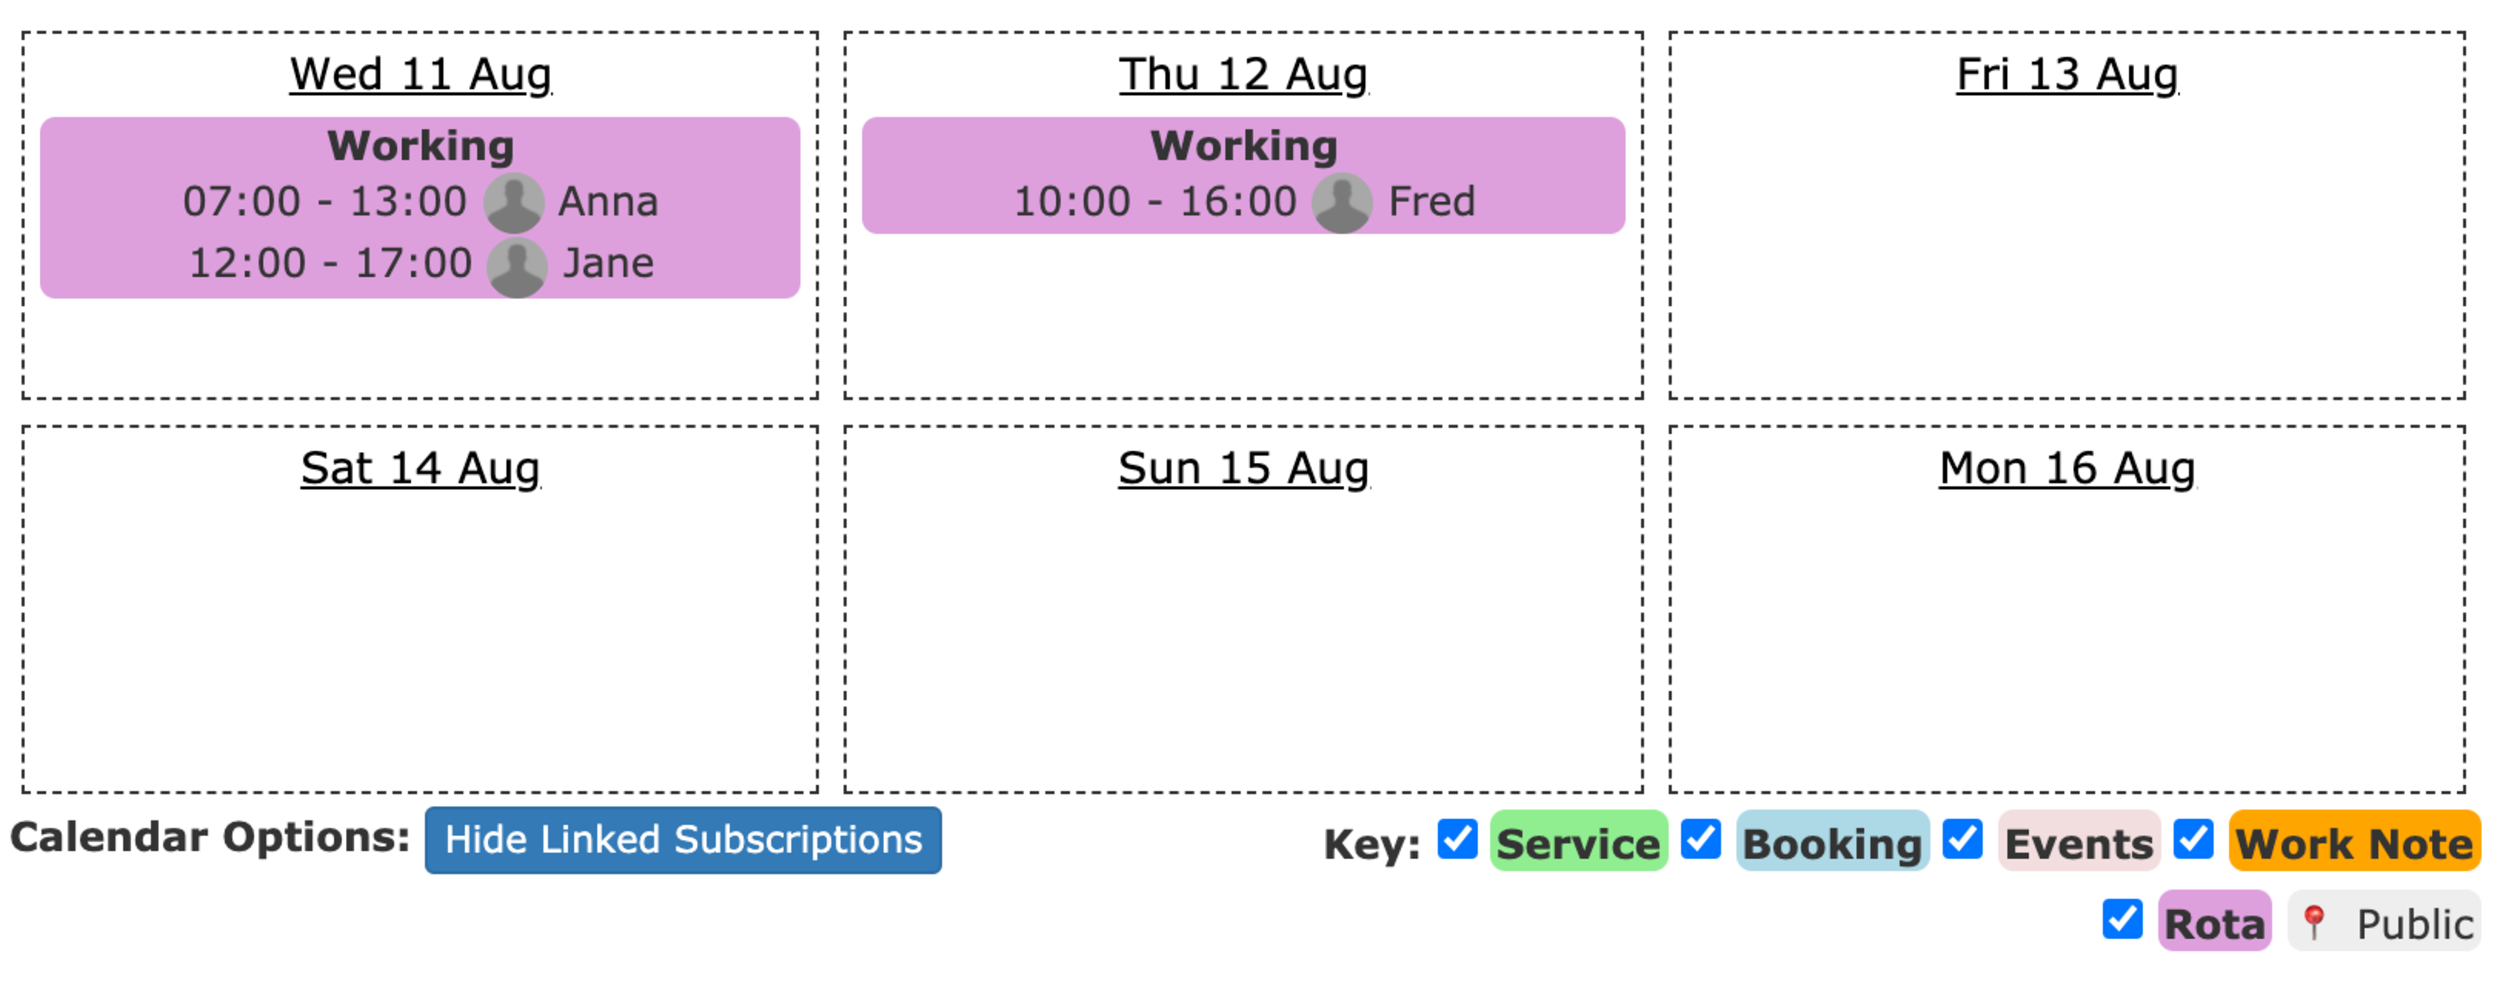
Once setup (which can be done by ticking the ‘show on forecasts’ button in manage Rotas) it’ll be great for everything from letting liveries know which member of staff will be available on a day through to letting everyone know who’s turn it is to clear the paddock.
If you have any feedback or would like to suggest any additional enhancements to the Rota feature please let us know on our contact page or by talking to your account manager.