
Blog
Today we’re announcing a brand new and major feature we’ve been working on. It’s one that’s been requested by many of our customers and will add a whole new way of using At The Yard. We call it Kiosk View.
The Kiosk view can be used by yards to allow their customers quick and easy access to At The Yard, allow them to make bookings, orders and to keep everyone informed about up and coming events. Its availability and visibility acts as a direct replacement for the old yard diary or book.
To make this possible all you need to do is find a tablet or old PC to place in your tack room or communal area. Once set up with the Kiosk view your customers can start using it straight away.
Without further ado we’ve put together a short promo video outlining what you can do with the Kiosk.
The key features made available to users through to Kiosk view are:
Once set up your users just need to choose what they want to do (book, purchase, order), select their name and then fill in the options. It’s as easy as that!
This feature further reduces the barrier to entry in getting your yard up and running with At The Yard. No longer will you require your customers to have a smart phone or tablet as now they can do all the basics from the Kiosk view.
We’ve designed the Kiosk view to run on most tablets but will be happy to optimise a version for popular tablets chosen by our subscribers (iPad, Kindle Fire etc). In addition to this, there are a range of Kiosk stands for tablets that can be purchased (e.g. https://www.amazon.co.uk/s?k=ipad+secure+kiosk ) to help get the tablet installed safely at your yard. As we receive feedback from our subscribers we’ll be posting some of our favourite setups to our Facebook page along with popular stands being used.
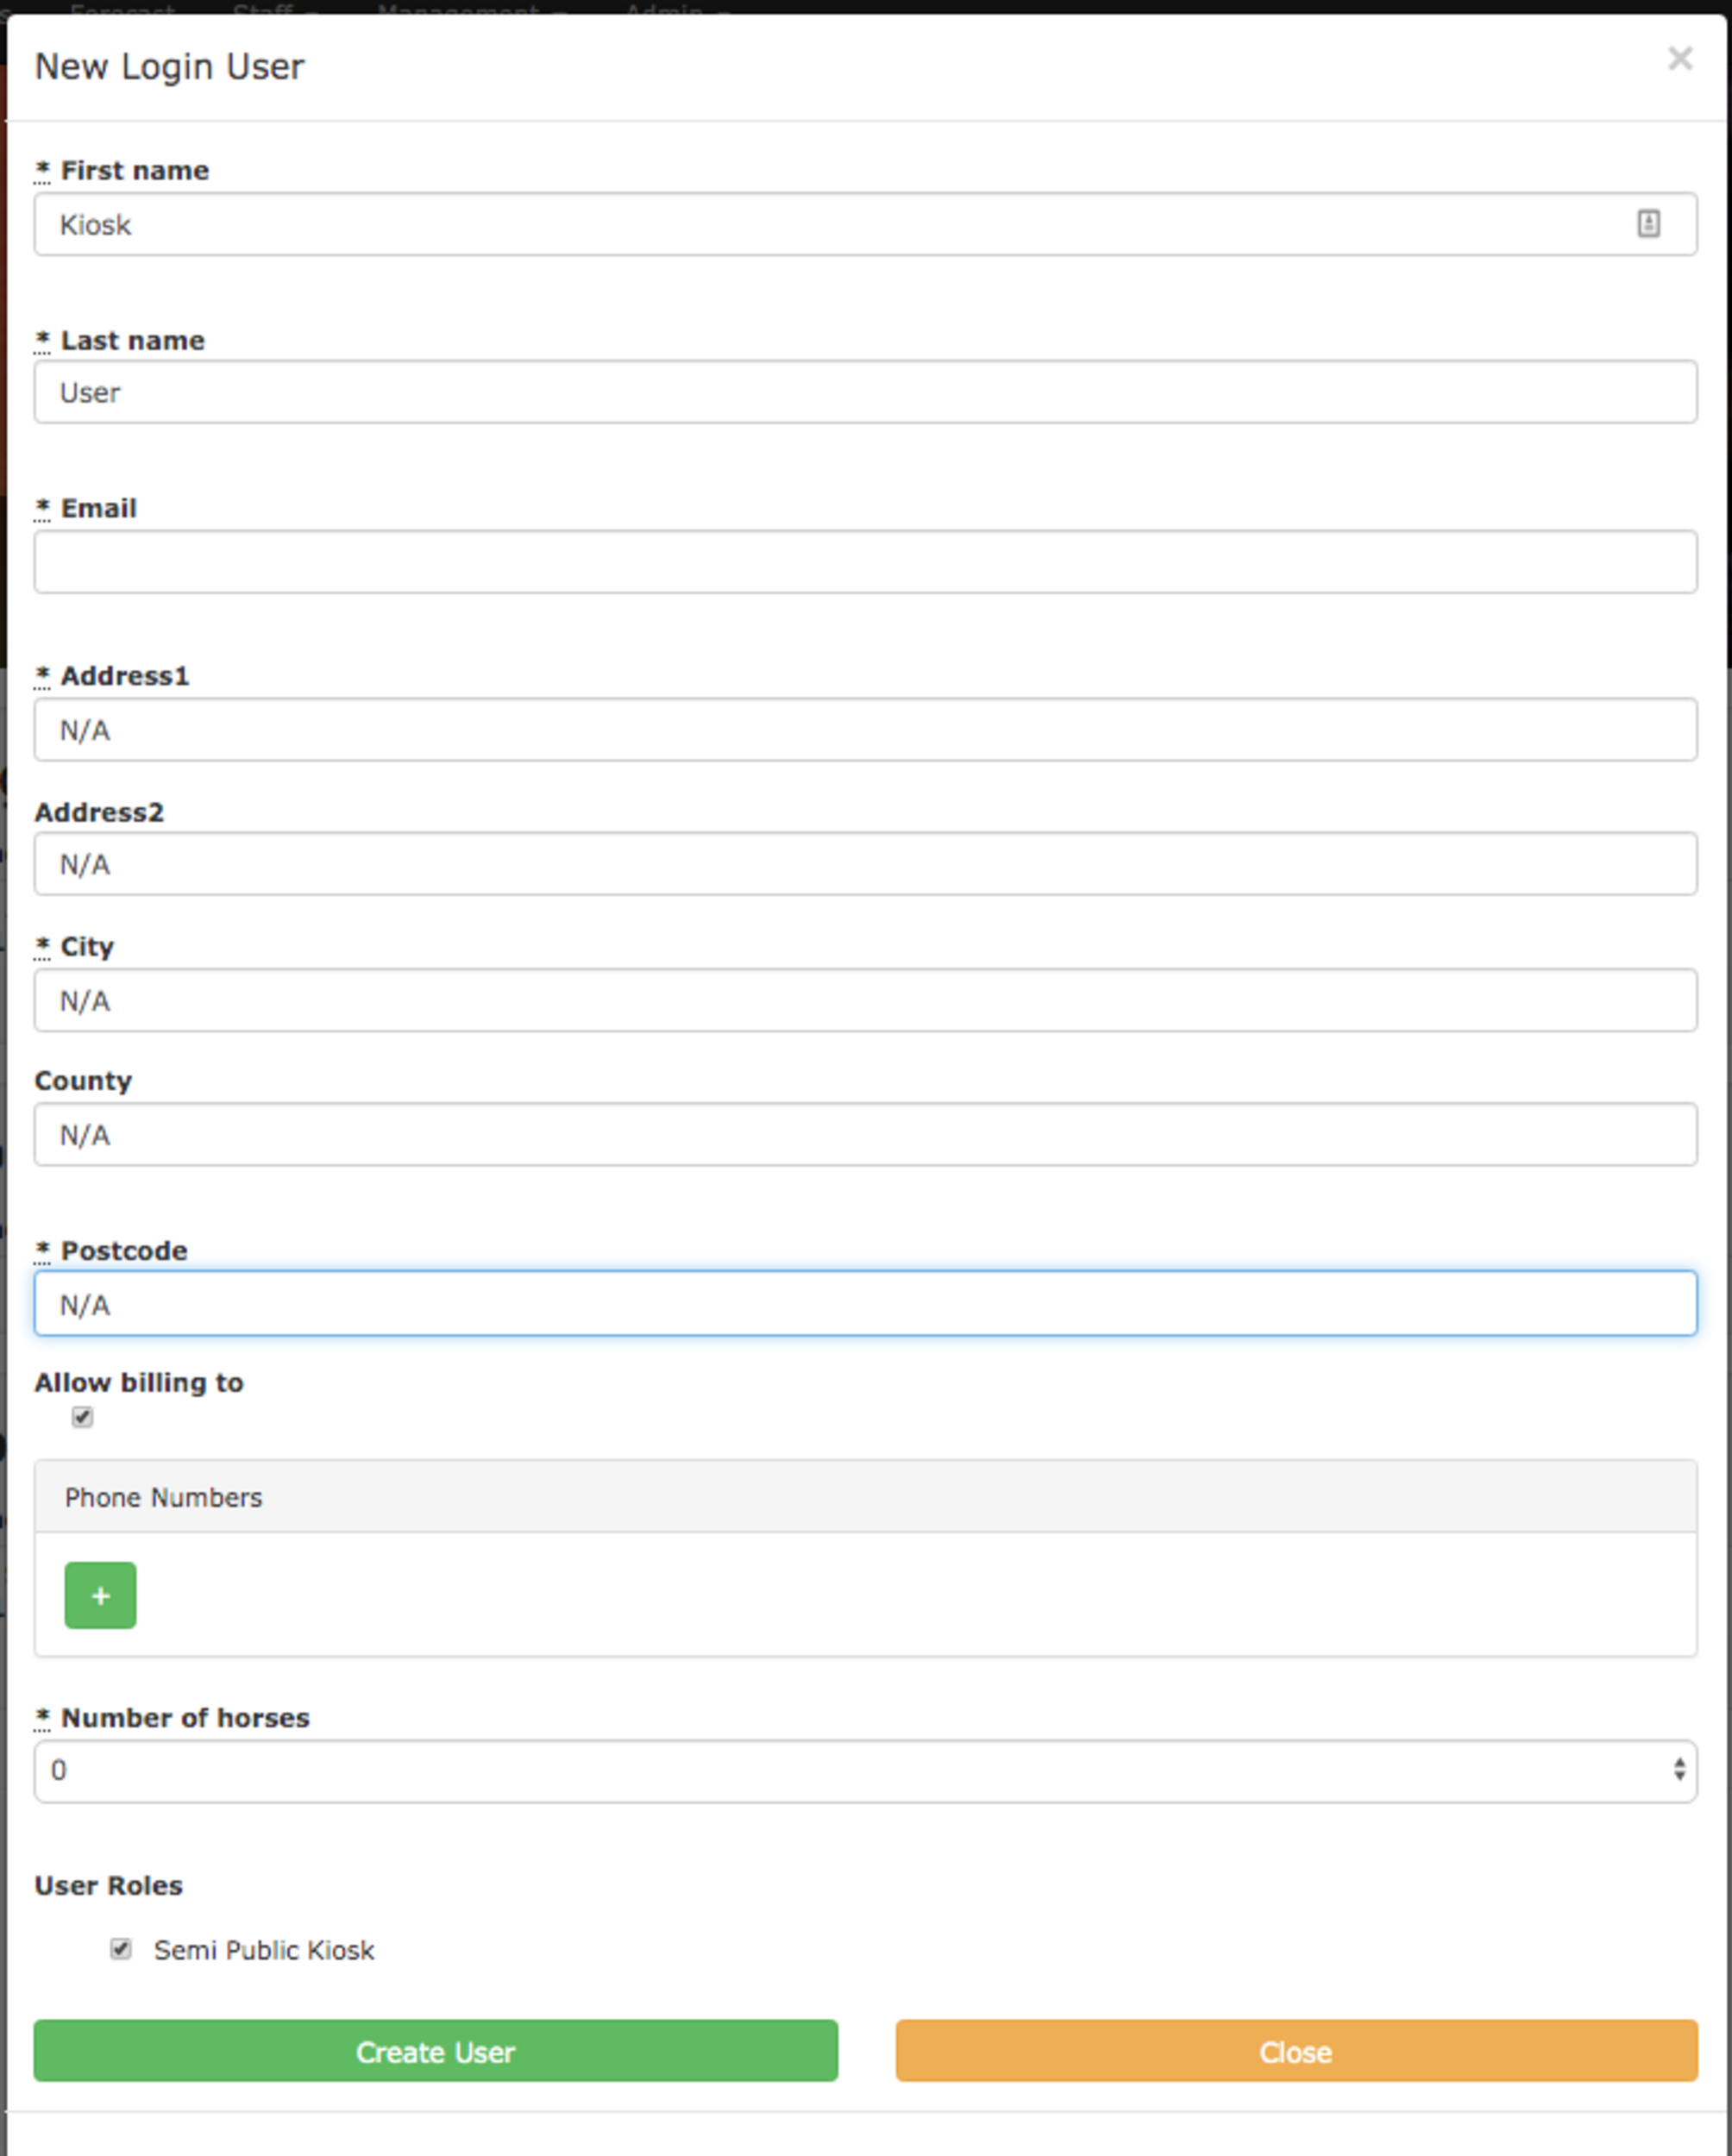
The setup process for the Kiosk view is very similar to a standard user set up. So the first thing is to go to the Admin -> Users page. From there, click on Create New User button.

You’ll be shown the user type selector where you’ll need to click the Create a Special User button. This will bring up a standard New Login User form. For the majority of the fields you can fill them in with N/A and select 0 horses and remove the default phone number box.
Please Note: We’ll be clearing this screen up in the future so you don’t have to put the N/A in manually
Once done click on Create User and your new kiosk user will have been created.

The email account you entered in the above step will receive an email which will allow you to set the password for the new Kiosk user. Once set up you can then use this email & password to login on your tablet. Login works just like a normal user, go to your yard’s individual address on the tablet and enter the login details.
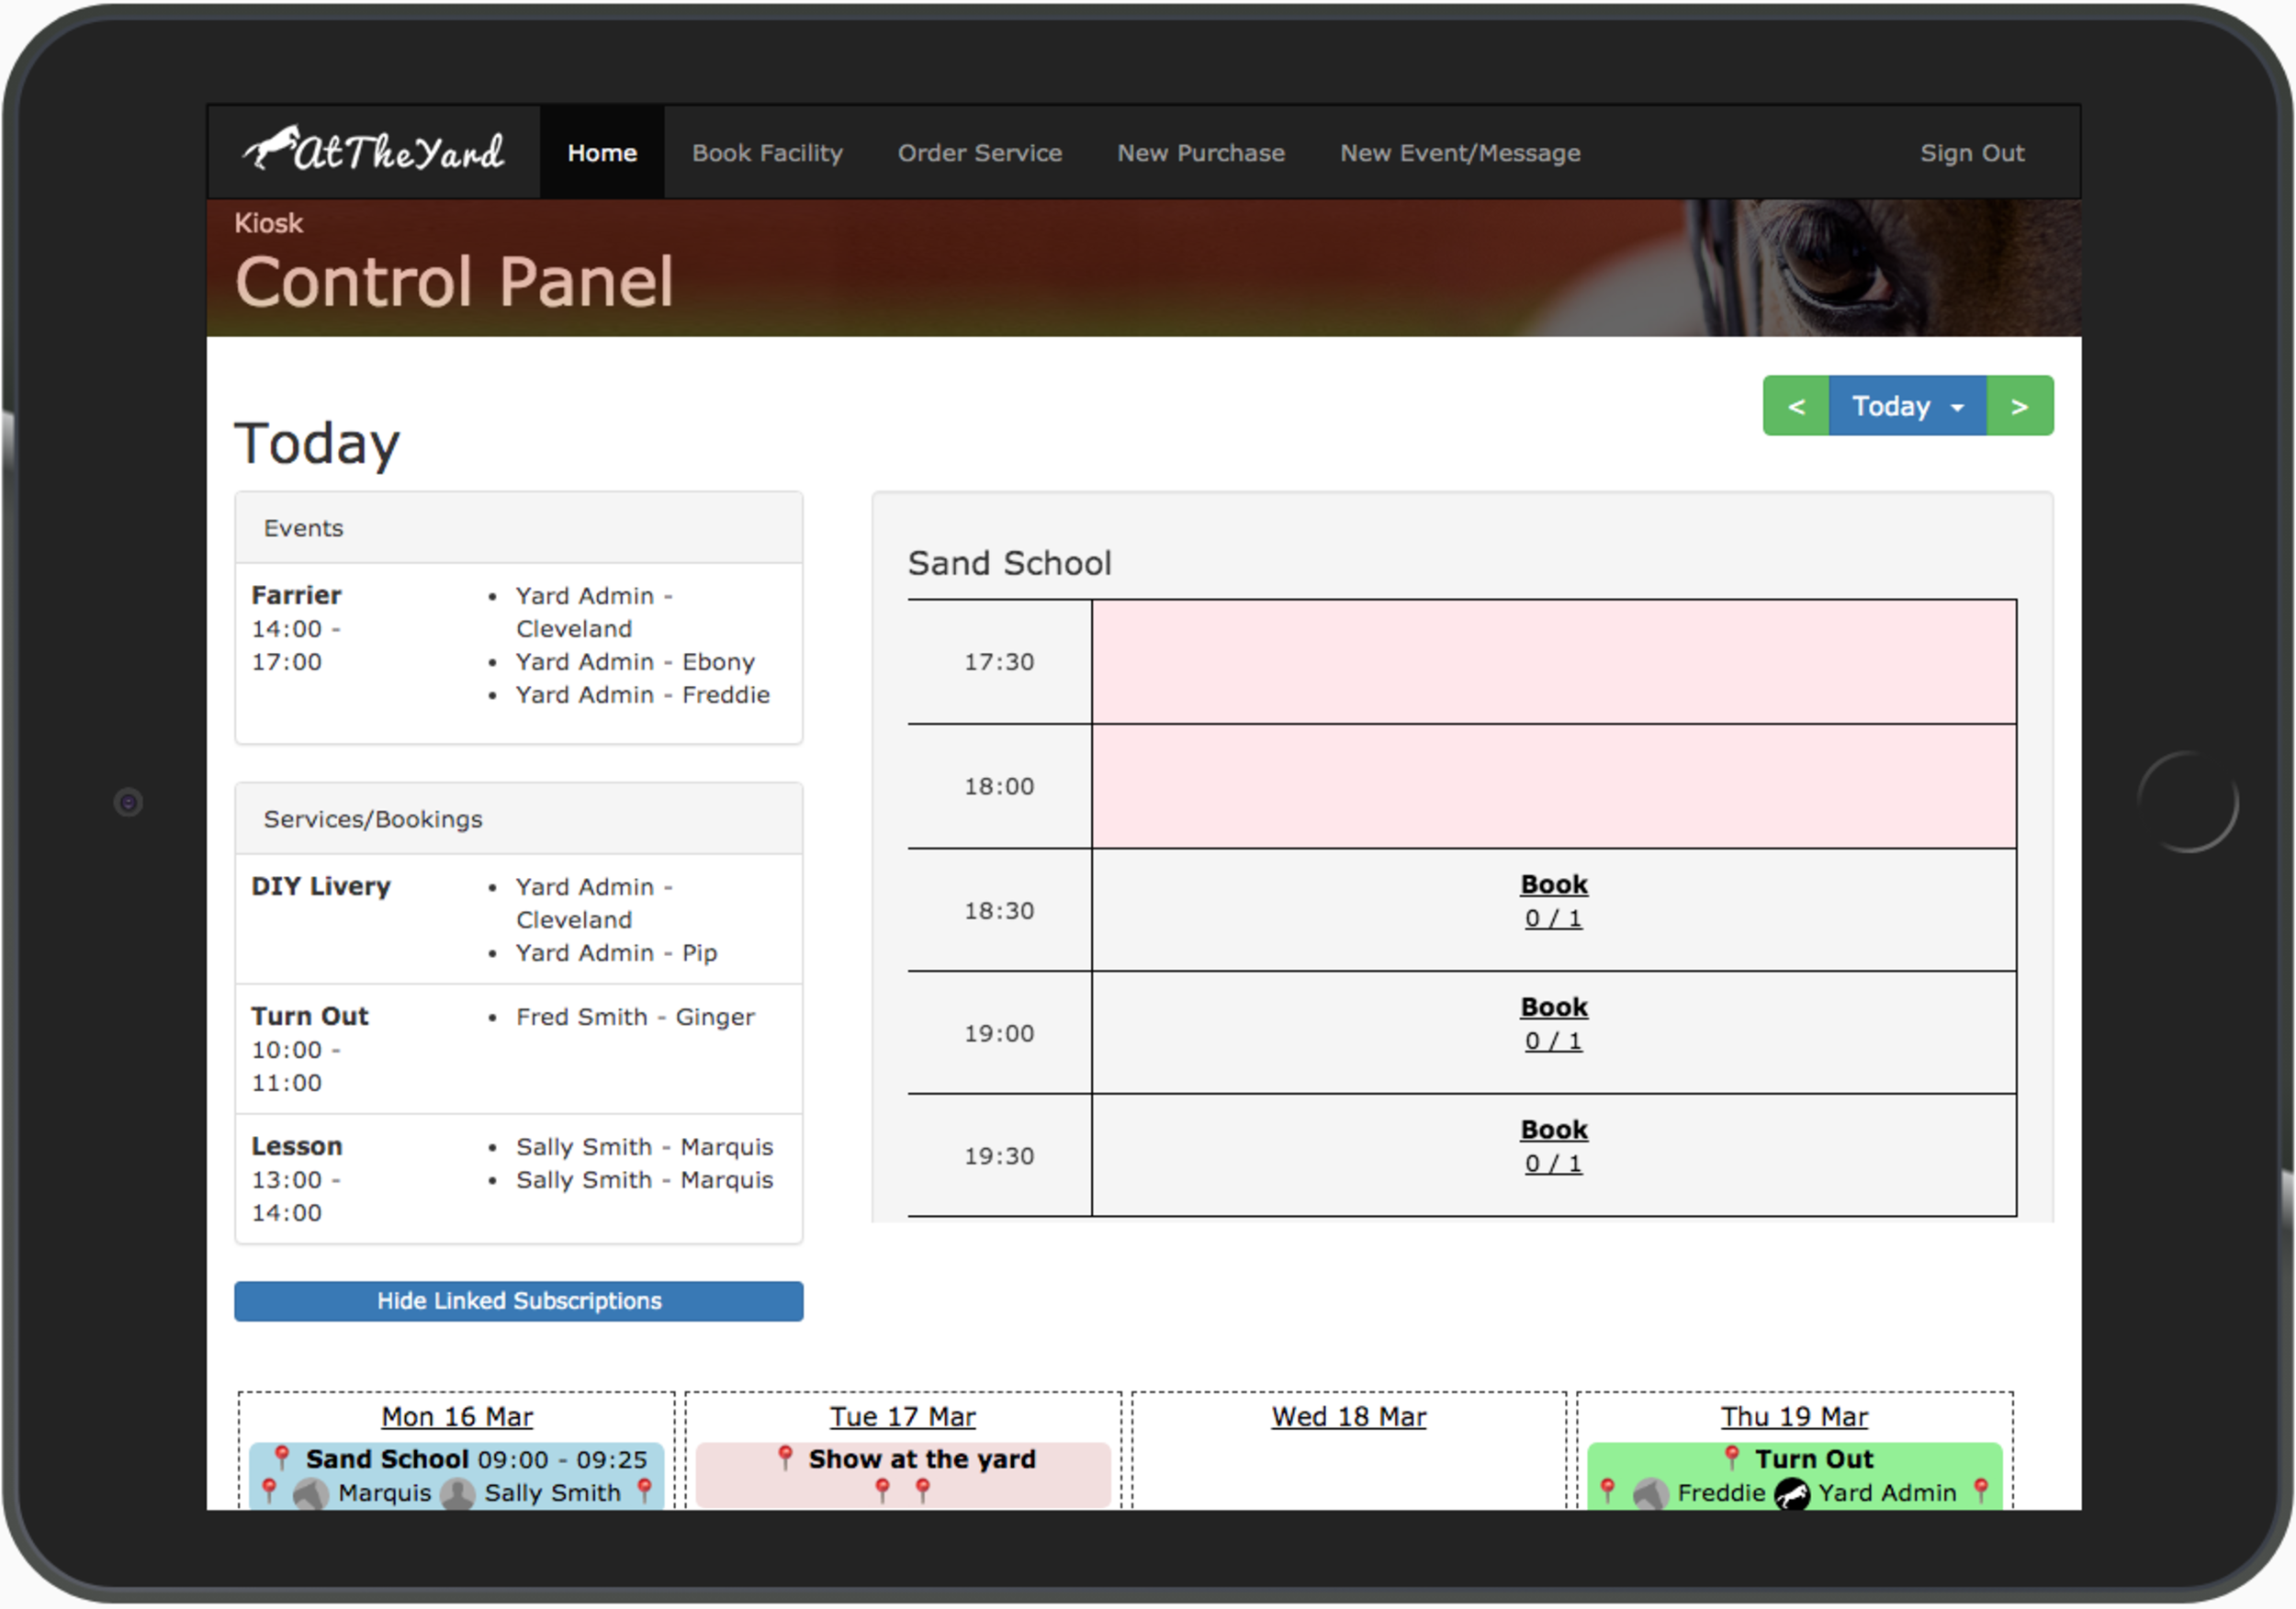
The first screen you’ll be welcomed with is the diary view. This gives an overview of the day’s events, services and bookings. This page automatically refreshes which means this screen will never be more than a few minutes out of date.
We can’t wait to see this feature out in the wild and installed in your tack rooms, barns and everywhere in between.
Along with getting a secure kiosk mount for your tablet we want to remind you that as this kiosk view allows anyone with physical access (or the account details) to make purchases, booking and orders etc on behalf of other customer it’s important to put this in an area that only customers you trust can access it. You also need to ensure your use of it is compliant with your privacy and data protection policies (this would be the same as when you were using a paper diary showing the same information). It’s also important to outline the rules of use to your customers to ensure it’s used responsibly.
It’s hard to believe it’s been over a month since we last published a post here. We promise we’ve been hard at work on a brand new, big and exciting feature and well…. this isn’t it!
This is a post about a small usability improvement we’ve released. As exciting? No - but still important. It’s the new and improved Date Picker.
This update introduces a calendar dropdown view (shown below) replacing the existing dropdown list of dates. This means you can now navigate between days, months and even years in a couple of clicks (rather than the old way where you had to do it using the list in many small jumps).

We use our date picker across At The Yard. Everywhere from the forecast view through to stock control and analytics. This means every little improvement in this small component adds up to a noticeable improvement across the product.
We’ll be back soon with the big update so stay tuned (or maybe try skipping ahead a week or so with the new Date Picker 😆).
At The Yard has a wide range of ways for your customers to record their needs/requests. From Facility Bookings through to Service Orders the customer can choose what they need when they need it (inline with the rules and restrictions you put in place as the yard manager).
However, as much as structure is important, there is always somethings we can’t predict or don’t fit into a predefined box. You need to let your customers let you know what’s going on or allow them to give you and/or the entire yard a message.
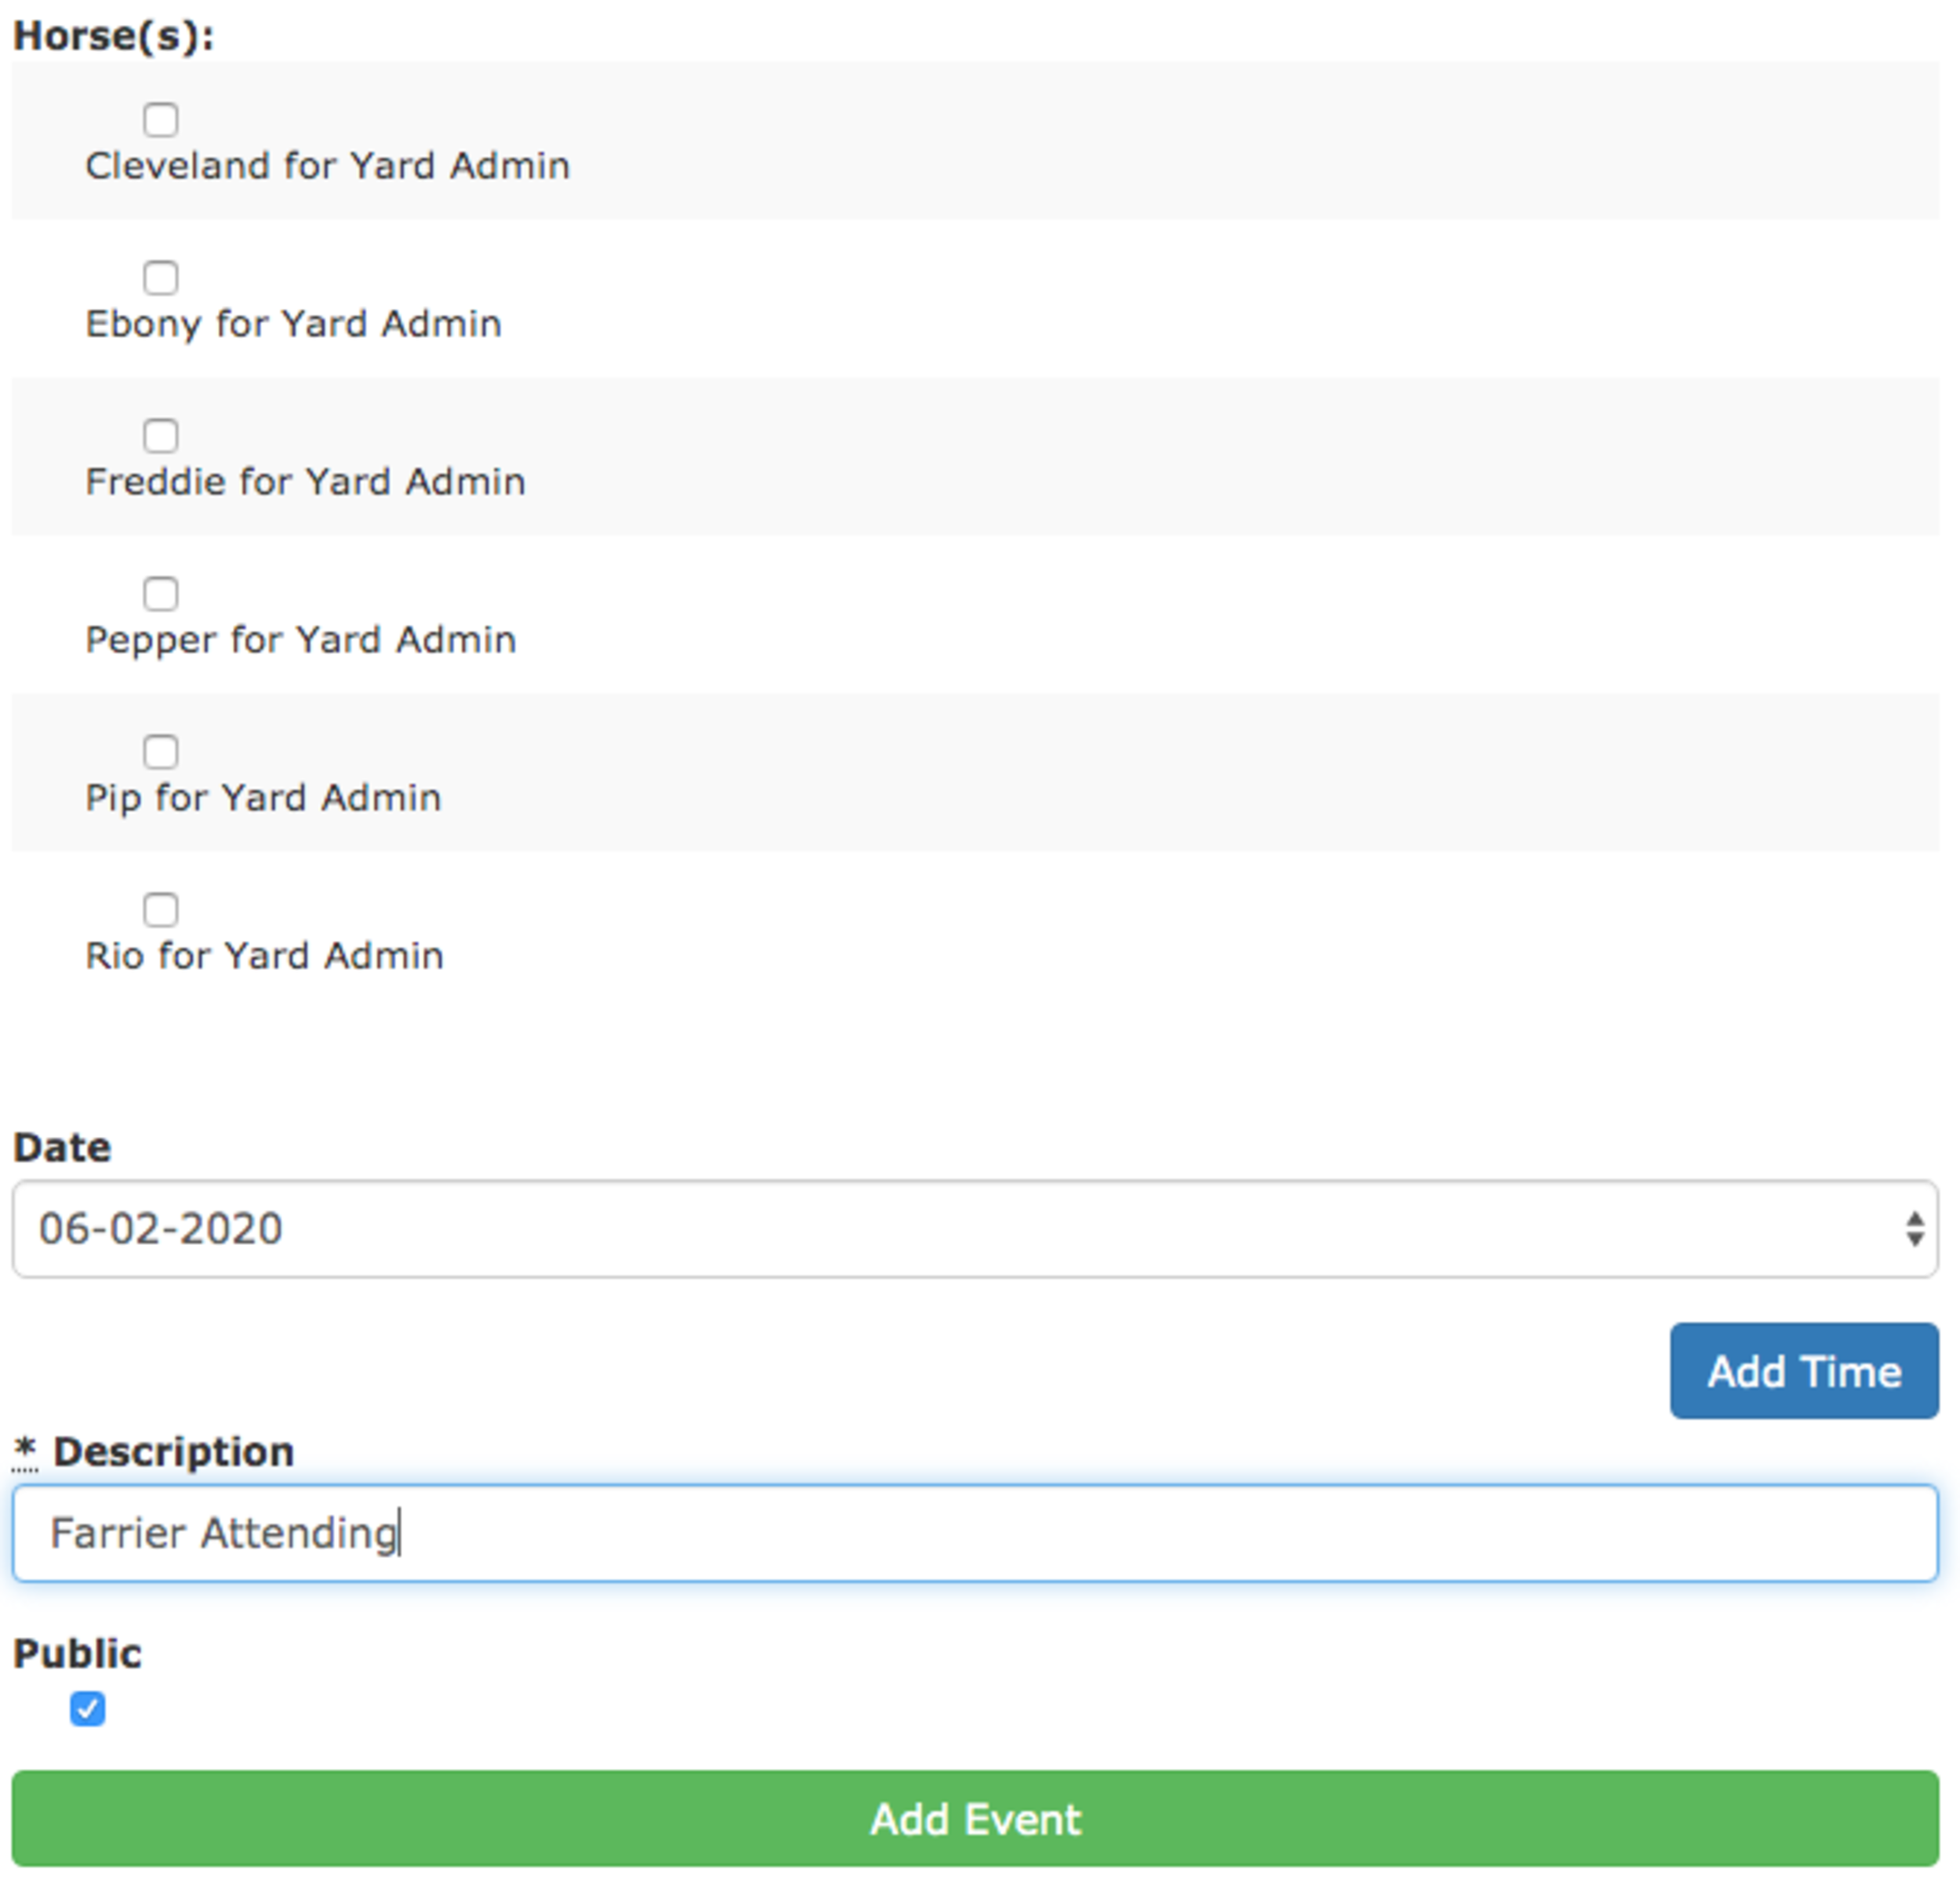
To support this we have what we call Messages & Events. This allows you to simply write your message (as you might do on a whiteboard or notebook), choose the horse(s) (if any) the message applies to and finally choose to share it with everyone or just yourself and staff. It’s as easy & as quick as that.
Of course the benefit of putting it into At The Yard is that the customer can write the message from anywhere and that it can be read from anywhere (the office, the stable block etc).
Some examples of this might be:
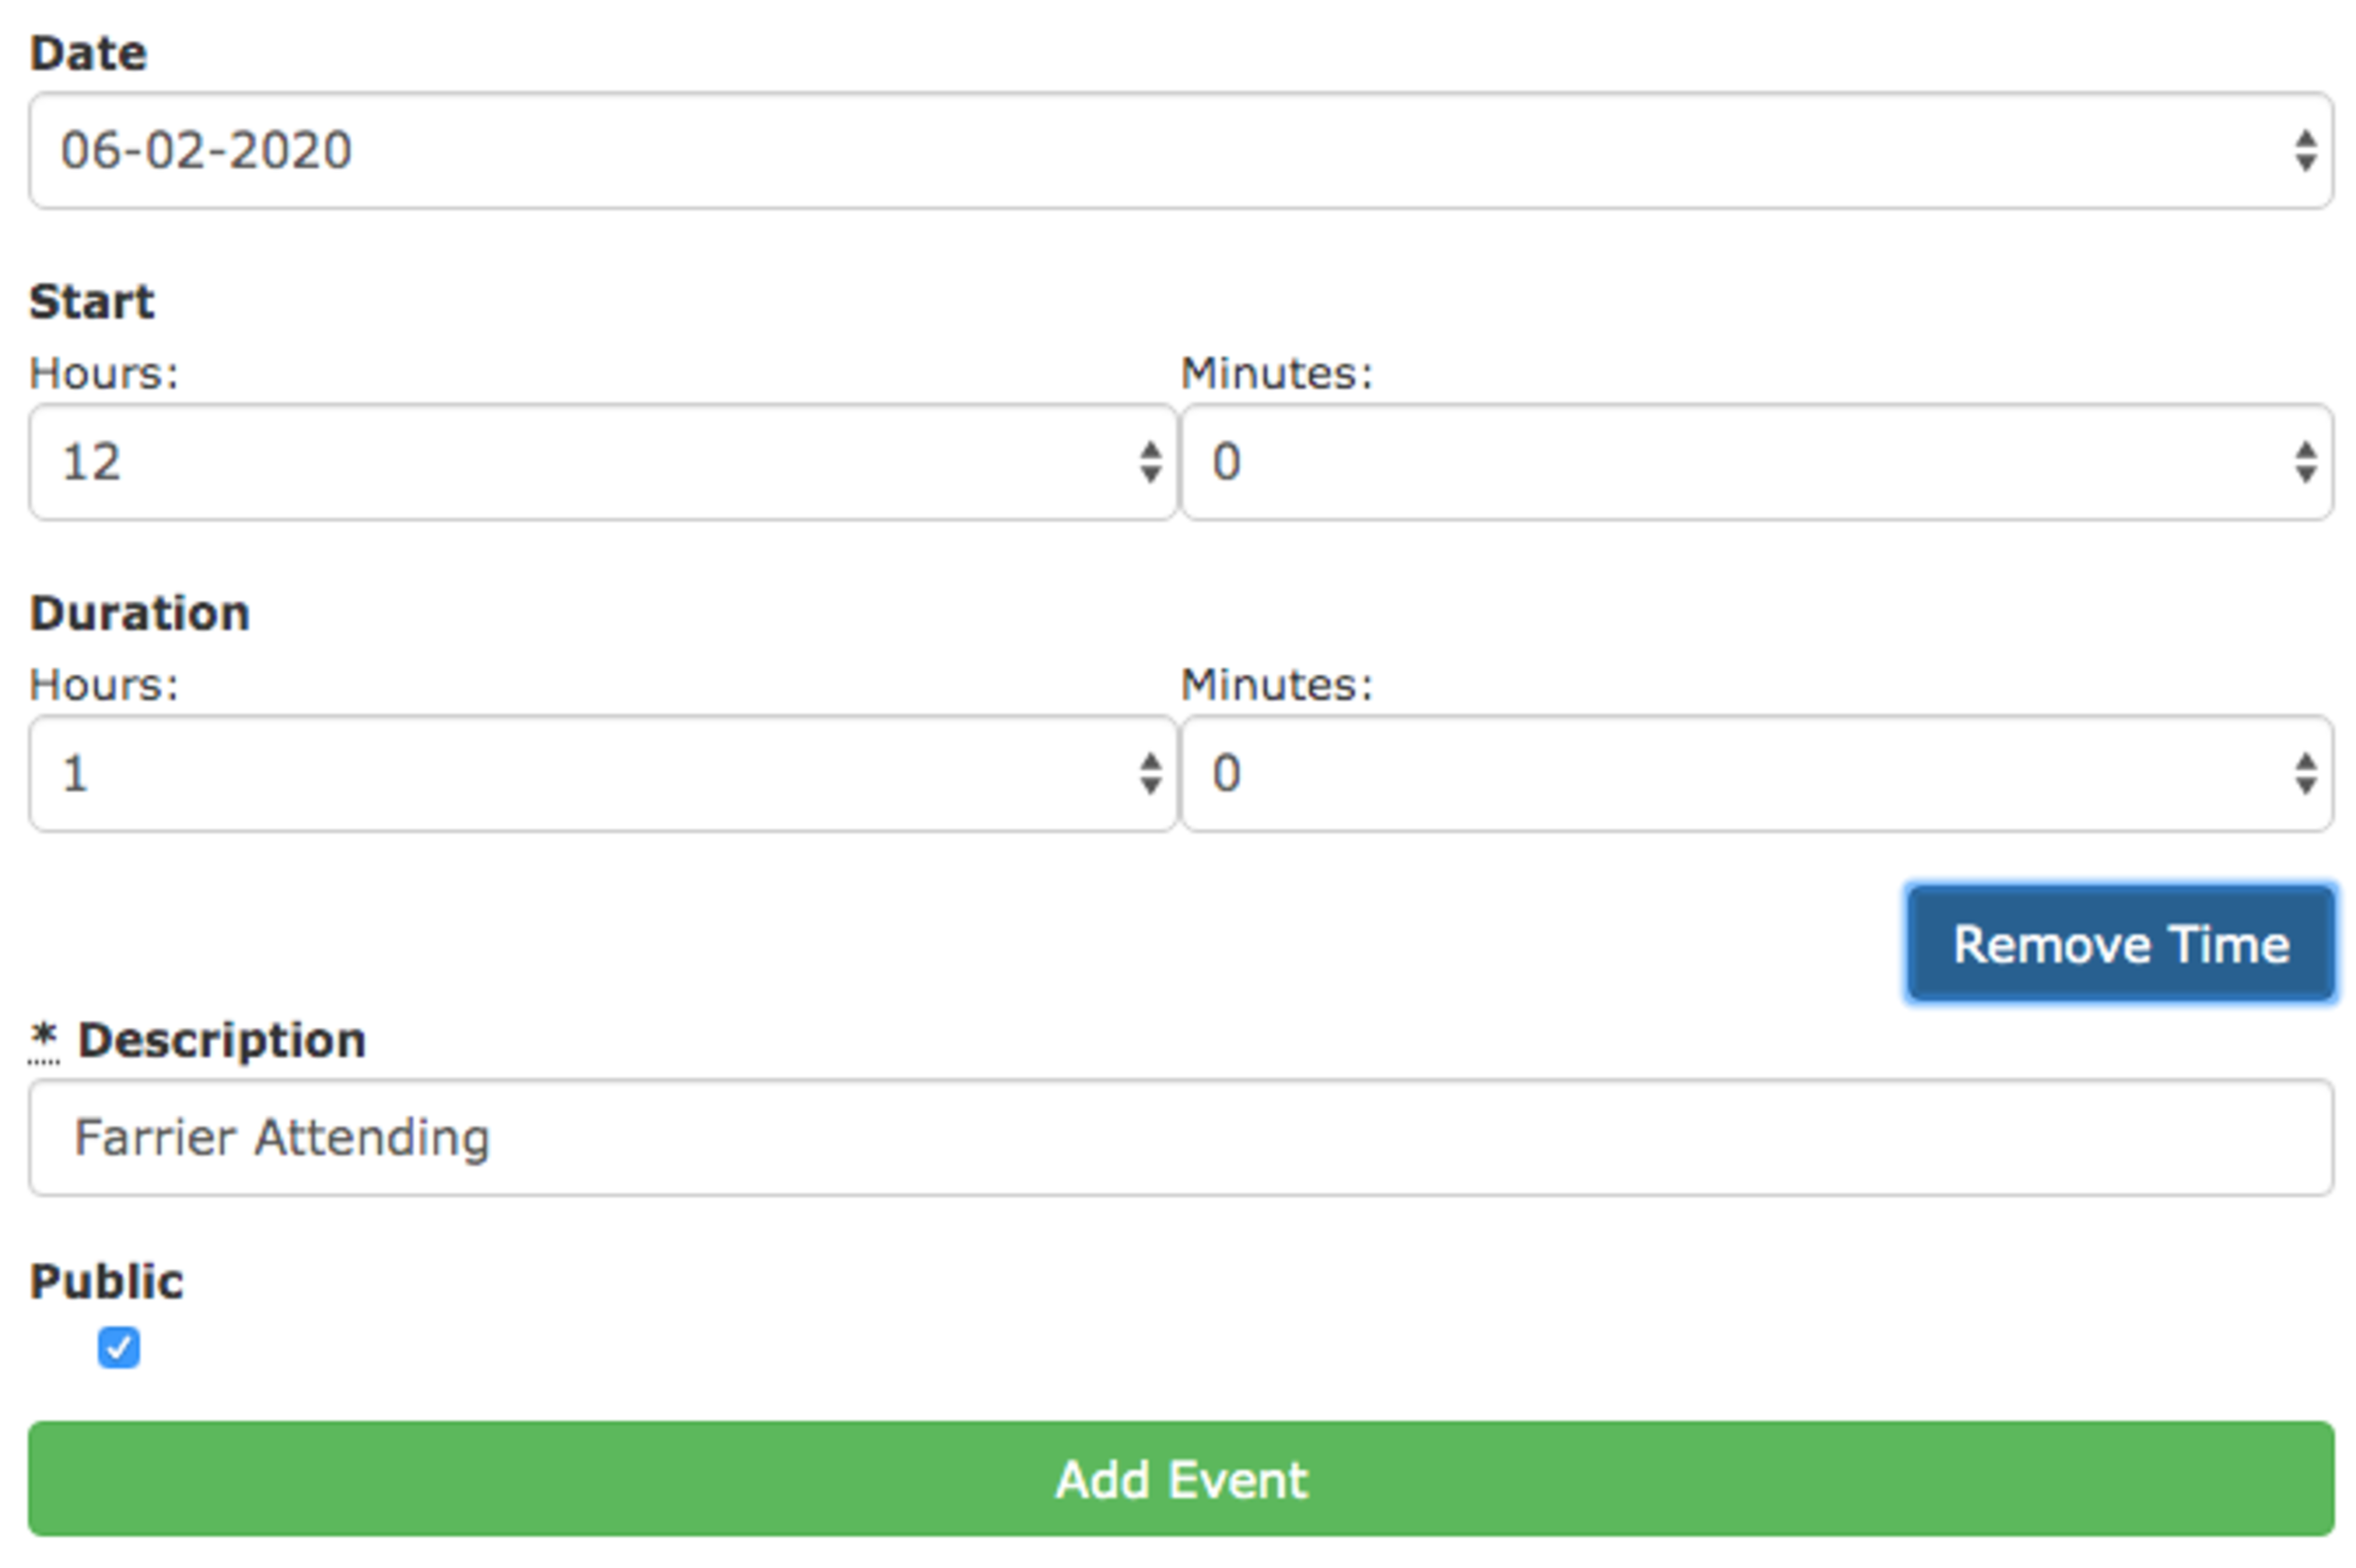
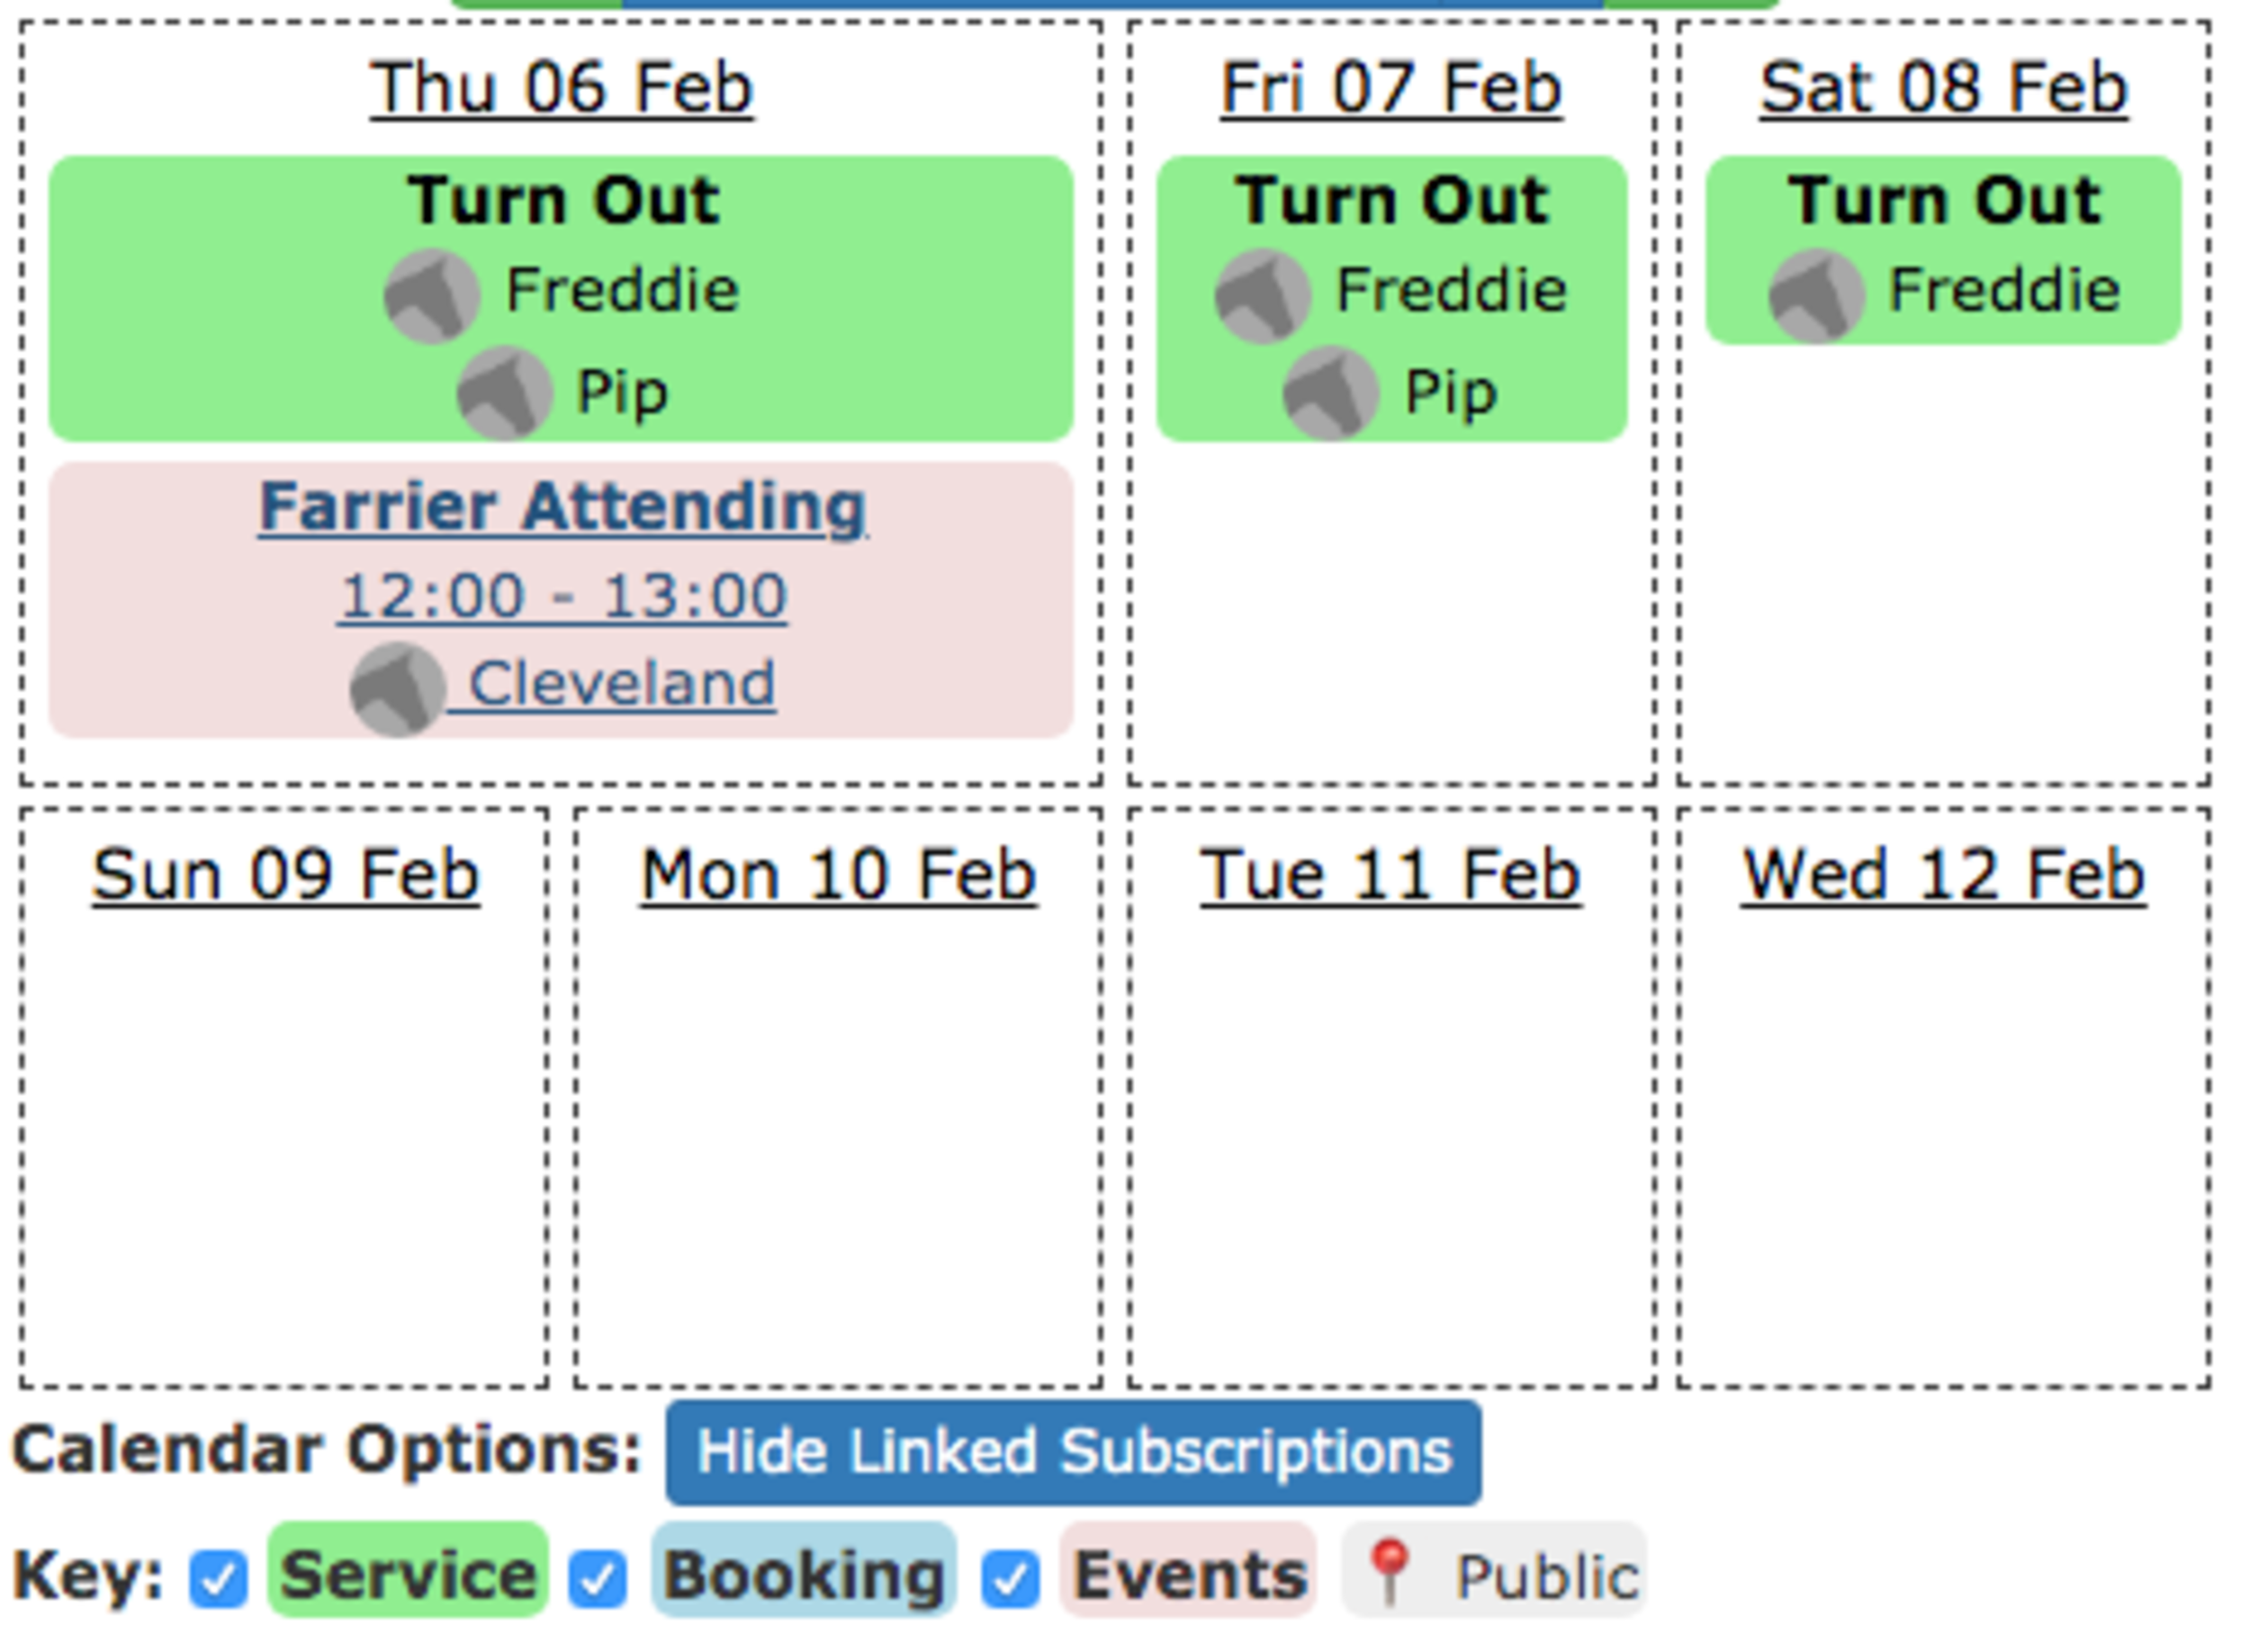
We’ve recently released an update to the Messages & Events system to, by default, make it easier and quicker to create the message. The update removes the requirement to add a time to the event. This means you no longer have to choose a time for an event which applies all day (e.g. putting on a rug) whilst still retaining the ability to be more specific when necessary (e.g. when letting people know when the farrier is coming).
And like most things in At The Yard this is then shown both on a users personal calendar & the staff forecast view.
This update makes a small improvement to the usability of an existing feature. We’re working on some major new features so keep an eye on our blog & Facebook to keep up to date.

Being Equestrians ourselves we spend everyday pouring over the weather forecast. How cold will it go overnight? Will it rain today? We do this all in service of making the right choices for the myriad of decisions we have to make everyday! From which rug to put on through to deciding when to bring in - weather is always on our mind!
To help everyone with their weather addiction we’re introducing ‘Weather Forecasts’ into At The Yard. It’ll be visible on any calendar view (shown below) throughout the product for both customers & staff.
Whilst not designed to replace your favourite weather app, it’ll now show the overall weather condition and the high/low temperature for the day. Enough, at-least, to keep you roughly informed with only a glance!


This weather feature is powered by https://darksky.net/ who’s mobile app we’ve been using personally for years and so we’re excited to be bringing that data into At The Yard.
We’re also using the excellent Climacon weather icons created by Adam Whitcroft (http://adamwhitcroft.com/climacons/) which you’ll see on all our forecasts.
There is a small bit of one off setup you have to do as a yard owner to get this working. Simply go to Admin —> Yard Config. Once there, click on the Edit button under Location. If you then scroll down to the Location For Weather section and enter the Latitude and Longitude for your yards location. To find this out we just did a quick Google search (https://www.google.com/search?q=latitude+and+longitude+finder) and used one of the sites to convert the location to Lat/Long. Once you’ve done it once it’ll be available for all your customers to see.
In At The Yard we have always had Services & Facilities. Initially this was to differentiate between:
However, as time has moved on the difference between these two, whilst still there, has become blurred. For example a Riding Lesson fulfilled by a member of staff is still a service, but the timing of it has to suit both the instructor, the customer and also the availability of the arena.
To make this possible we’ve introduced an upgrade to Services in At The Yard - Service Ordering by Calendar View. This allows you to have the best of both worlds!
You can still define something like a Lesson as a service (as it should be) but have all the features previously only found in facilities such as slot lengths, max bookings per slot and more.
To get this setup is quite simple. When creating a new Discrete Service you need to select ‘Yes’ under ‘Allow ordering by calendar?’. When you do this you’ll be presented with the option to setup the parameters of the available slots (as seen below).

Once filled in click ‘Create Service’ as normal and your new calendar view service is ready.
Underlying this new feature is a ‘Hidden Facility’ which is created to co-exist with the service. Not only does this mean we can bring you all of the existing features supported by facilities, but as we add more they’ll automatically be included.
Personally we’re really excited for this update. Not only will it make everything clearer to both staff and customers but it also resolves a personal ‘annoyance’ for us, in that before you had to use various workarounds to make this functionality possible.